PowerDNS部署
PowerDNS简介
PowerDNS成立于上世纪90年代后期,是开源DNS的主要供应商,目前主要产品有Authoritative Server、Recursor和Dnsdist产品,目前是完全开源的,PowerDNS也有商业化的产品支持,其用户和客户包括了全球领先的电信服务供应商、大型集成商及财富500强软件公司,在斯堪的纳维亚、德国和荷兰,PowerDNS是域名服务器软件的第一大供应商。
权威服务器(Authoritative Nameserver)
应用场景
众所周知DNS服务器主要负责域名解析功能,通俗的讲,就是把域名转化成IP地址,对于小型企业而言,可能会认为此功能意义不大,但我仍然推荐使用域名系统,可能有人会讲,IP地址也同样可以使用,为什么需要使用域名,这其中原因众多,简单列举以下几个方面:
- 域名相对IP地址而言更便于记忆,命名也更加人性化,如baidu.com、sina.cn,没人愿意通过IP来记住这些常用站点;
- 域名支持7层转发,而IP仅支持4层,域名可以是*.b.c,但是IP只能是12.34.56.78:[端口号],域名的*比端口号1~65535扩展性更强;
- 域名支持跨站点的负载均衡功能,IP可通过类似vrrp协议实现业务的二层虚拟IP访问,但功能和扩展性上而言总体上弱于域名;
- 域名切换可实现业务零停机,只需要通过修改DNS解析结果即可实现业务迁移,而IP地址显然是不可能实现的。
服务安装
PowerDNS家的三款产品仅支持类Unix系统,所以无法运行于Windows平台,推荐使用Linux,这里使用一台CentOS7的服务器作为安装对象。安装过程其实非常简单,参照https://repo.powerdns.com/上的安装命令即可完成安装。安装步骤如下:
1、安装pdns权威服务器4.6
yum install -y epel-release yum-plugin-priorities &&
curl -o /etc/yum.repos.d/powerdns-auth-46.repo https://repo.powerdns.com/repo-files/el-auth-46.repo &&
yum install pdns -y
2、安装pdns服务器后端
通过yum list pdns-backend* | grep 4.6,可查看所有pdns后端相关的包:
pdns-backend-geoip.x86_64              4.6.0-1pdns.el7          powerdns-auth-46
pdns-backend-ldap.x86_64               4.6.0-1pdns.el7          powerdns-auth-46
pdns-backend-lmdb.x86_64               4.6.0-1pdns.el7          powerdns-auth-46
pdns-backend-lua2.x86_64               4.6.0-1pdns.el7          powerdns-auth-46
pdns-backend-mysql.x86_64              4.6.0-1pdns.el7          powerdns-auth-46
pdns-backend-odbc.x86_64               4.6.0-1pdns.el7          powerdns-auth-46
pdns-backend-pipe.x86_64               4.6.0-1pdns.el7          powerdns-auth-46
pdns-backend-postgresql.x86_64         4.6.0-1pdns.el7          powerdns-auth-46
pdns-backend-remote.x86_64             4.6.0-1pdns.el7          powerdns-auth-46
pdns-backend-sqlite.x86_64             4.6.0-1pdns.el7          powerdns-auth-46
pdns-backend-tinydns.x86_64            4.6.0-1pdns.el7          powerdns-auth-46
这里,使用mysql作为数据库,因此需要安装pdns-backend-mysql.x86_64:
yum -y install pdns-backend-mysql.x86_64
3、安装并配置MySQL数据库
安装mariadb-server
yum -y install mariadb-server
启动mariadb服务,创建并导入pdns数据库模板,
systemctl enable mariadb --now

mysql -uroot
create DATABASE pdns;
grant all privileges on pdns.* to pdns@localhost identified by 'pdns@1024';
flush privileges;

use pdns;

CREATE TABLE domains (
 id          INT AUTO_INCREMENT,
 name         VARCHAR(255) NOT NULL,
 master        VARCHAR(128) DEFAULT NULL,
 last_check      INT DEFAULT NULL,
 type         VARCHAR(6) NOT NULL,
 notified_serial    INT UNSIGNED DEFAULT NULL,
 account        VARCHAR(40) CHARACTER SET 'utf8' DEFAULT NULL,
 PRIMARY KEY (id)
) Engine=InnoDB CHARACTER SET 'latin1';

CREATE UNIQUE INDEX name_index ON domains(name);


CREATE TABLE records (
 id          BIGINT AUTO_INCREMENT,
 domain_id       INT DEFAULT NULL,
 name         VARCHAR(255) DEFAULT NULL,
 type         VARCHAR(10) DEFAULT NULL,
 content        VARCHAR(64000) DEFAULT NULL,
 ttl          INT DEFAULT NULL,
 prio         INT DEFAULT NULL,
 disabled       TINYINT(1) DEFAULT 0,
 ordername       VARCHAR(255) BINARY DEFAULT NULL,
 auth         TINYINT(1) DEFAULT 1,
 PRIMARY KEY (id)
) Engine=InnoDB CHARACTER SET 'latin1';

CREATE INDEX nametype_index ON records(name,type);
CREATE INDEX domain_id ON records(domain_id);
CREATE INDEX ordername ON records (ordername);


CREATE TABLE supermasters (
 ip          VARCHAR(64) NOT NULL,
 nameserver      VARCHAR(255) NOT NULL,
 account        VARCHAR(40) CHARACTER SET 'utf8' NOT NULL,
 PRIMARY KEY (ip, nameserver)
) Engine=InnoDB CHARACTER SET 'latin1';


CREATE TABLE comments (
 id          INT AUTO_INCREMENT,
 domain_id       INT NOT NULL,
 name         VARCHAR(255) NOT NULL,
 type         VARCHAR(10) NOT NULL,
 modified_at      INT NOT NULL,
 account        VARCHAR(40) CHARACTER SET 'utf8' DEFAULT NULL,
 comment        TEXT CHARACTER SET 'utf8' NOT NULL,
 PRIMARY KEY (id)
) Engine=InnoDB CHARACTER SET 'latin1';

CREATE INDEX comments_name_type_idx ON comments (name, type);
CREATE INDEX comments_order_idx ON comments (domain_id, modified_at);


CREATE TABLE domainmetadata (
 id          INT AUTO_INCREMENT,
 domain_id       INT NOT NULL,
 kind         VARCHAR(32),
 content        TEXT,
 PRIMARY KEY (id)
) Engine=InnoDB CHARACTER SET 'latin1';

CREATE INDEX domainmetadata_idx ON domainmetadata (domain_id, kind);


CREATE TABLE cryptokeys (
 id          INT AUTO_INCREMENT,
 domain_id       INT NOT NULL,
 flags         INT NOT NULL,
 active        BOOL,
 published       BOOL DEFAULT 1,
 content        TEXT,
 PRIMARY KEY(id)
) Engine=InnoDB CHARACTER SET 'latin1';

CREATE INDEX domainidindex ON cryptokeys(domain_id);


CREATE TABLE tsigkeys (
 id          INT AUTO_INCREMENT,
 name         VARCHAR(255),
 algorithm       VARCHAR(50),
 secret        VARCHAR(255),
 PRIMARY KEY (id)
) Engine=InnoDB CHARACTER SET 'latin1';

CREATE UNIQUE INDEX namealgoindex ON tsigkeys(name, algorithm);
数据库模板来源:https://doc.powerdns.com/authoritative/backends/generic-mysql.html
4、配置并启动pdns服务器
服务器配置信息默认保存在/etc/pdns/pdns.conf ,
cp /etc/pdns/pdns.conf /etc/pdns/pdns.conf.default

cat /etc/pdns/pdns.conf |grep -Ev '^$|#'
daemon=no
guardian=no
setgid=pdns
setuid=pdns
修改完成后的pdns.conf文件
#默认配置
daemon=no
guardian=no
setgid=pdns
setuid=pdns

#数据库设置
launch=gmysql
gmysql-host=127.0.0.1
gmysql-dbname=pdns
gmysql-user=pdns
gmysql-password=pdns@1024

#DNS服务监听设置
local-address=0.0.0.0
local-port=53
启动pdns服务器
systemctl enable pdns --now
5、服务无法启动的处理
journalctl -xe命令报错信息如下:提示无法打开 /etc/pdns/pdns.conf 配置文件。
2月 10 16:29:46 localhost.localdomain pdns_server[19727]: Feb 10 16:29:46 Unable to open /etc/pdns/pdns.conf
解决方法:修改文件权限再次尝试启动。
chomod -R 755 /etc/pdns/pdns.conf
systemctl enable pdns --now
通过systemctl status pdns查看服务状态,使用netstat -naup查看服务端口监听状态。
[root@localhost ~]# systemctl status pdns
● pdns.service - PowerDNS Authoritative Server
   Loaded: loaded (/usr/lib/systemd/system/pdns.service; enabled; vendor preset: disabled)
   Active: active (running) since 四 2022-02-10 16:32:28 CST; 16s ago
     Docs: man:pdns_server(1)
           man:pdns_control(1)
           https://doc.powerdns.com
 Main PID: 20247 (pdns_server)
   CGroup: /system.slice/pdns.service
           └─20247 /usr/sbin/pdns_server --socket-dir=/run/pdns --guardian=no --daemon=no --disable-syslog --log-timestamp=no --write-pid=no
...........................................
[root@localhost ~]# netstat -naup
Active Internet connections (servers and established)
Proto Recv-Q Send-Q Local Address           Foreign Address         State       PID/Program name
udp        0      0 0.0.0.0:53              0.0.0.0:*                           20247/pdns_server
udp        0      0 0.0.0.0:68              0.0.0.0:*                           8464/dhclient
udp        0      0 127.0.0.1:323           0.0.0.0:*                           862/chronyd
udp6       0      0 ::1:323                 :::*                                862/chronyd

####Active: active (running) 表示服务处于激活状态
####服务运行于0 0.0.0.0:53
安装管理UI(可选)
pdns并未提供可视化的管理工具,但有第三方工具适配,对于不太习惯命令行的小伙伴来说,PowerDNS-Admin是个不错的选择。
项目地址:https://github.com/PowerDNS-Admin/PowerDNS-Admin
有几种方法可以运行 PowerDNS-Admin。 最简单的方法是使用 Docker。通过DockerHub上的镜像直接可运行其最新版本。
安装Docker
curl -fsSL https://get.docker.com | bash -s docker --mirror Aliyun
systemctl enable docker --now
运行PowerDNS-Admin
docker run -d \
    -e SECRET_KEY='a-very-secret-key' \
    -v pda-data:/data \
    -p 9191:80 \
    ngoduykhanh/powerdns-admin:latest
使用docker ps和netstat -natp查看容器运行情况
[root@localhost ~]# docker ps
CONTAINER ID   IMAGE                               COMMAND                  CREATED              STATUS                        PORTS                                   NAMES
baa1b563c403   ngoduykhanh/powerdns-admin:latest   "entrypoint.sh gunic…"   About a minute ago   Up About a minute (healthy)   0.0.0.0:9191->80/tcp, :::9191->80/tcp   suspicious_beaver
[root@localhost ~]#

[root@localhost ~]# netstat -natp
Active Internet connections (servers and established)
Proto Recv-Q Send-Q Local Address           Foreign Address         State       PID/Program name
tcp        0      0 0.0.0.0:9191            0.0.0.0:*               LISTEN      20807/docker-proxy
...........................
配置PowerDNS-Admin
在配置PowerDNS-Admin之前,需要对pdns服务器进行配置修改以便允许通过API进行管理:
修改/etc/pdns/pdns.conf文件,修改后如下:
#默认配置
daemon=no
guardian=no
setgid=pdns
setuid=pdns

#数据库设置
launch=gmysql
gmysql-host=127.0.0.1
gmysql-dbname=pdns
gmysql-user=pdns
gmysql-password=pdns@1024

#DNS服务监听设置
local-address=0.0.0.0
local-port=53

#api及web服务配置
api=yes
api-key=pdns_api_key
webserver=yes
webserver-address=0.0.0.0
webserver-allow-from=0.0.0.0/0
webserver-port=8081
修改完成后通过systemctl restart pdns对服务进行重启。
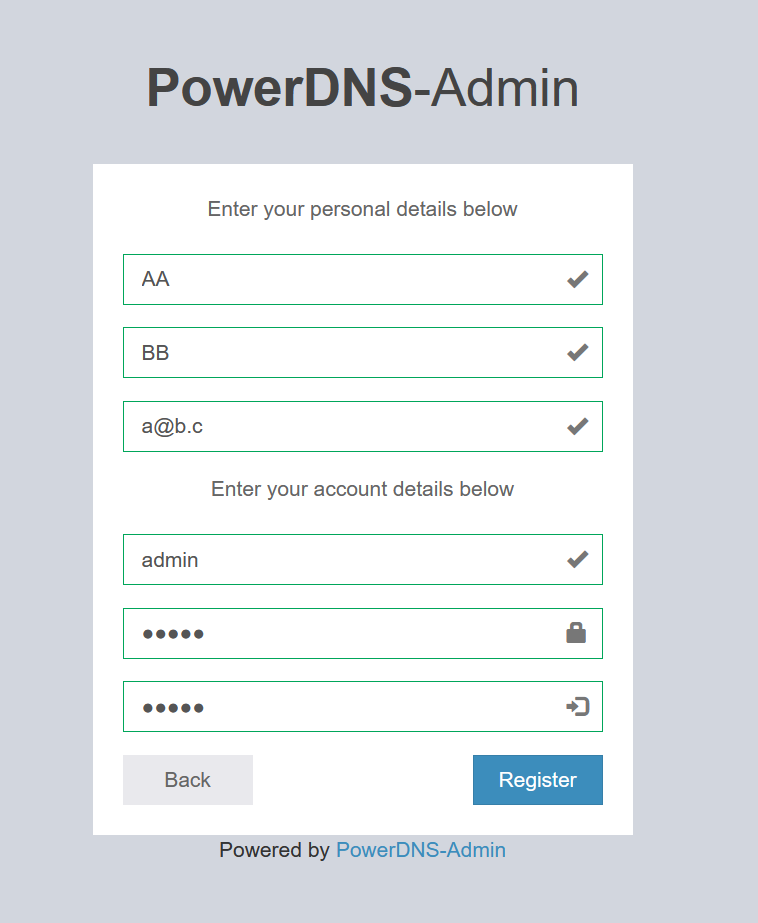
浏览器访问http://服务器IP:9191,选择创建一个用户,输入相关内容后,此账户即为管理员账户

账户创建完成后,登录到管理界面,到Settings——PDNS下填写pdns服务器相关信息,并点击Update更新,以本服务器为例:
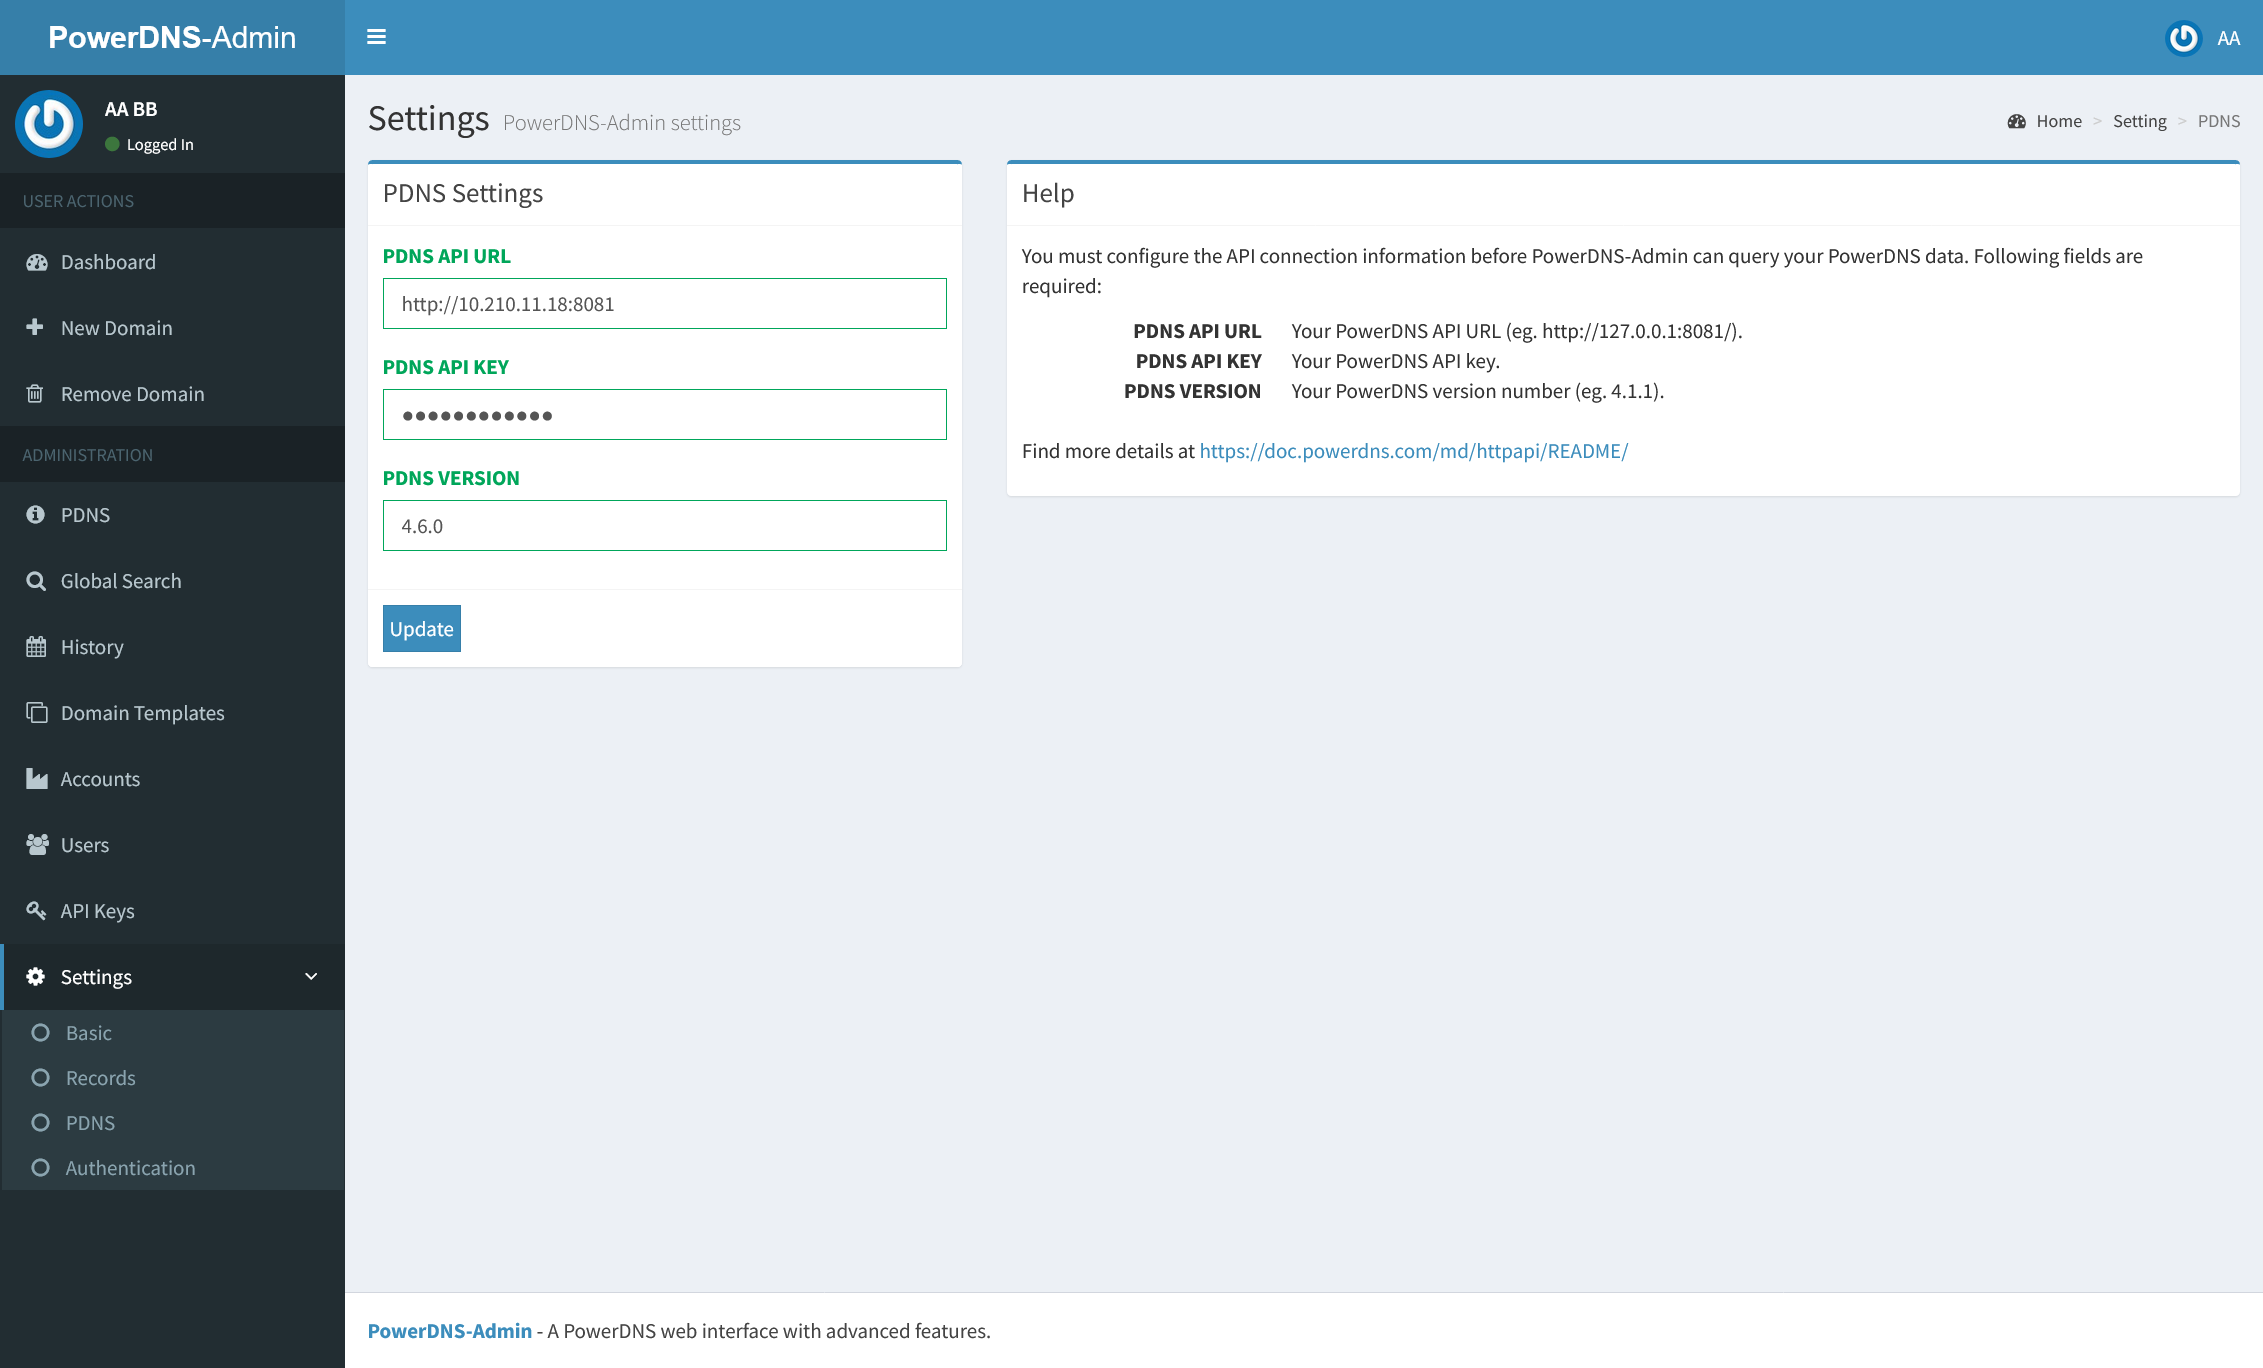
至此管理UI安装完成。
日常操作
使用PowerDNS-Admin管理Pdns
创建本机域
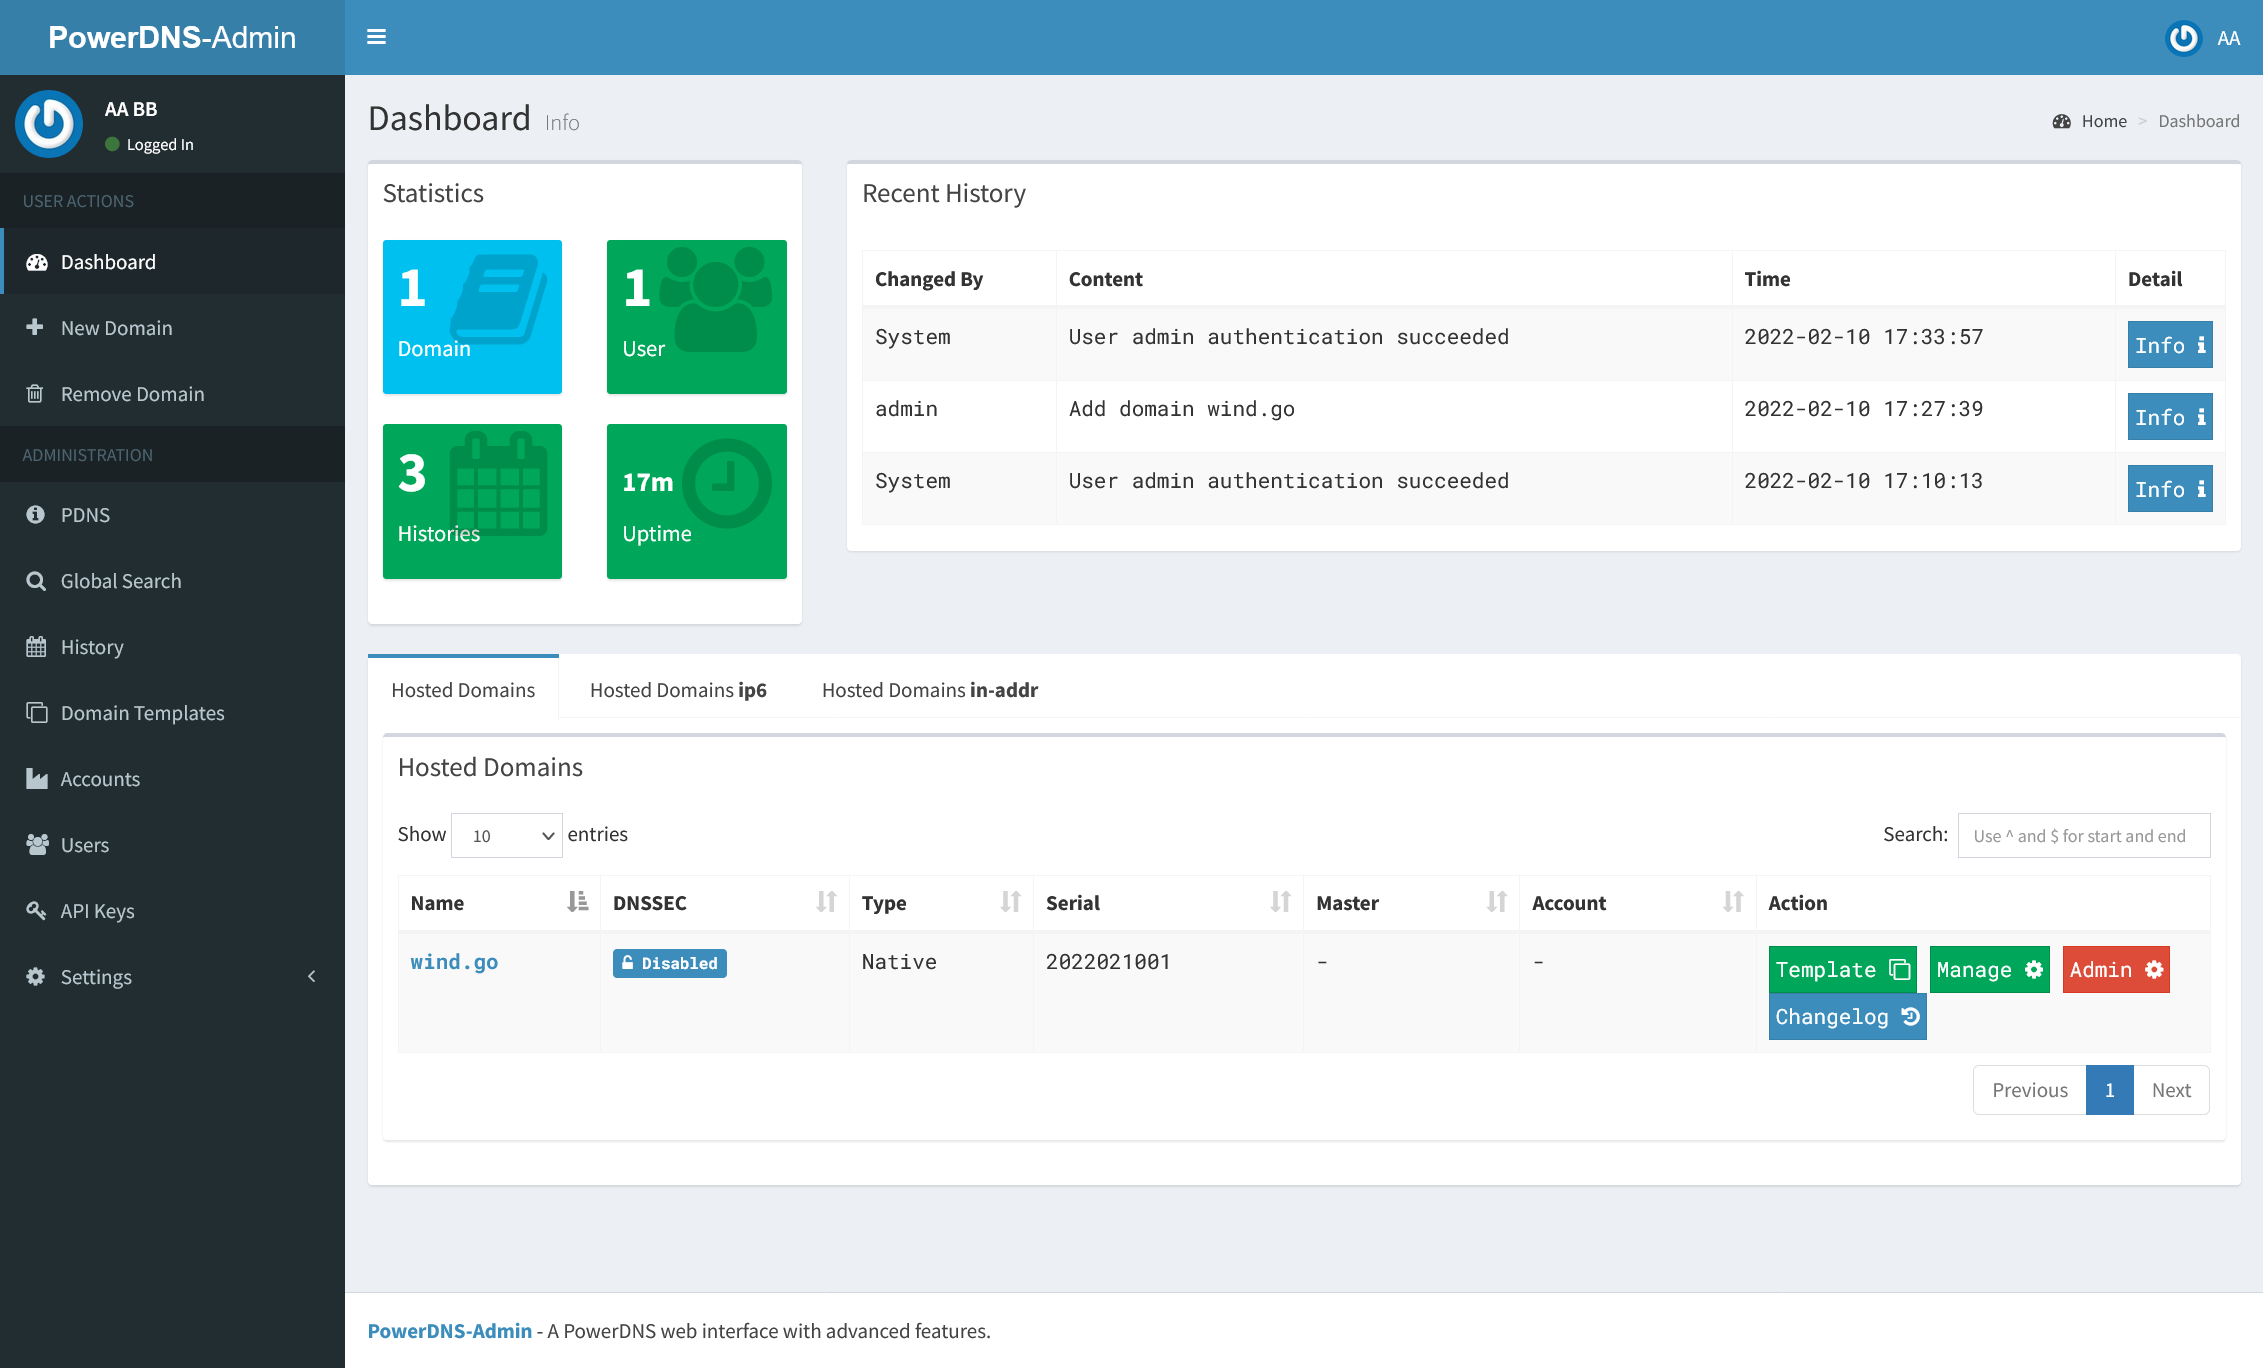
登录PowerDNS-Admin,左侧选择+New Domain,即可添加新的域,如下图,点击提交,即可创建了一个wind.go的域:

服务器上使用pdnsutil list-all-zones命令进行验证
[root@localhost ~]# pdnsutil list-all-zones
wind.go
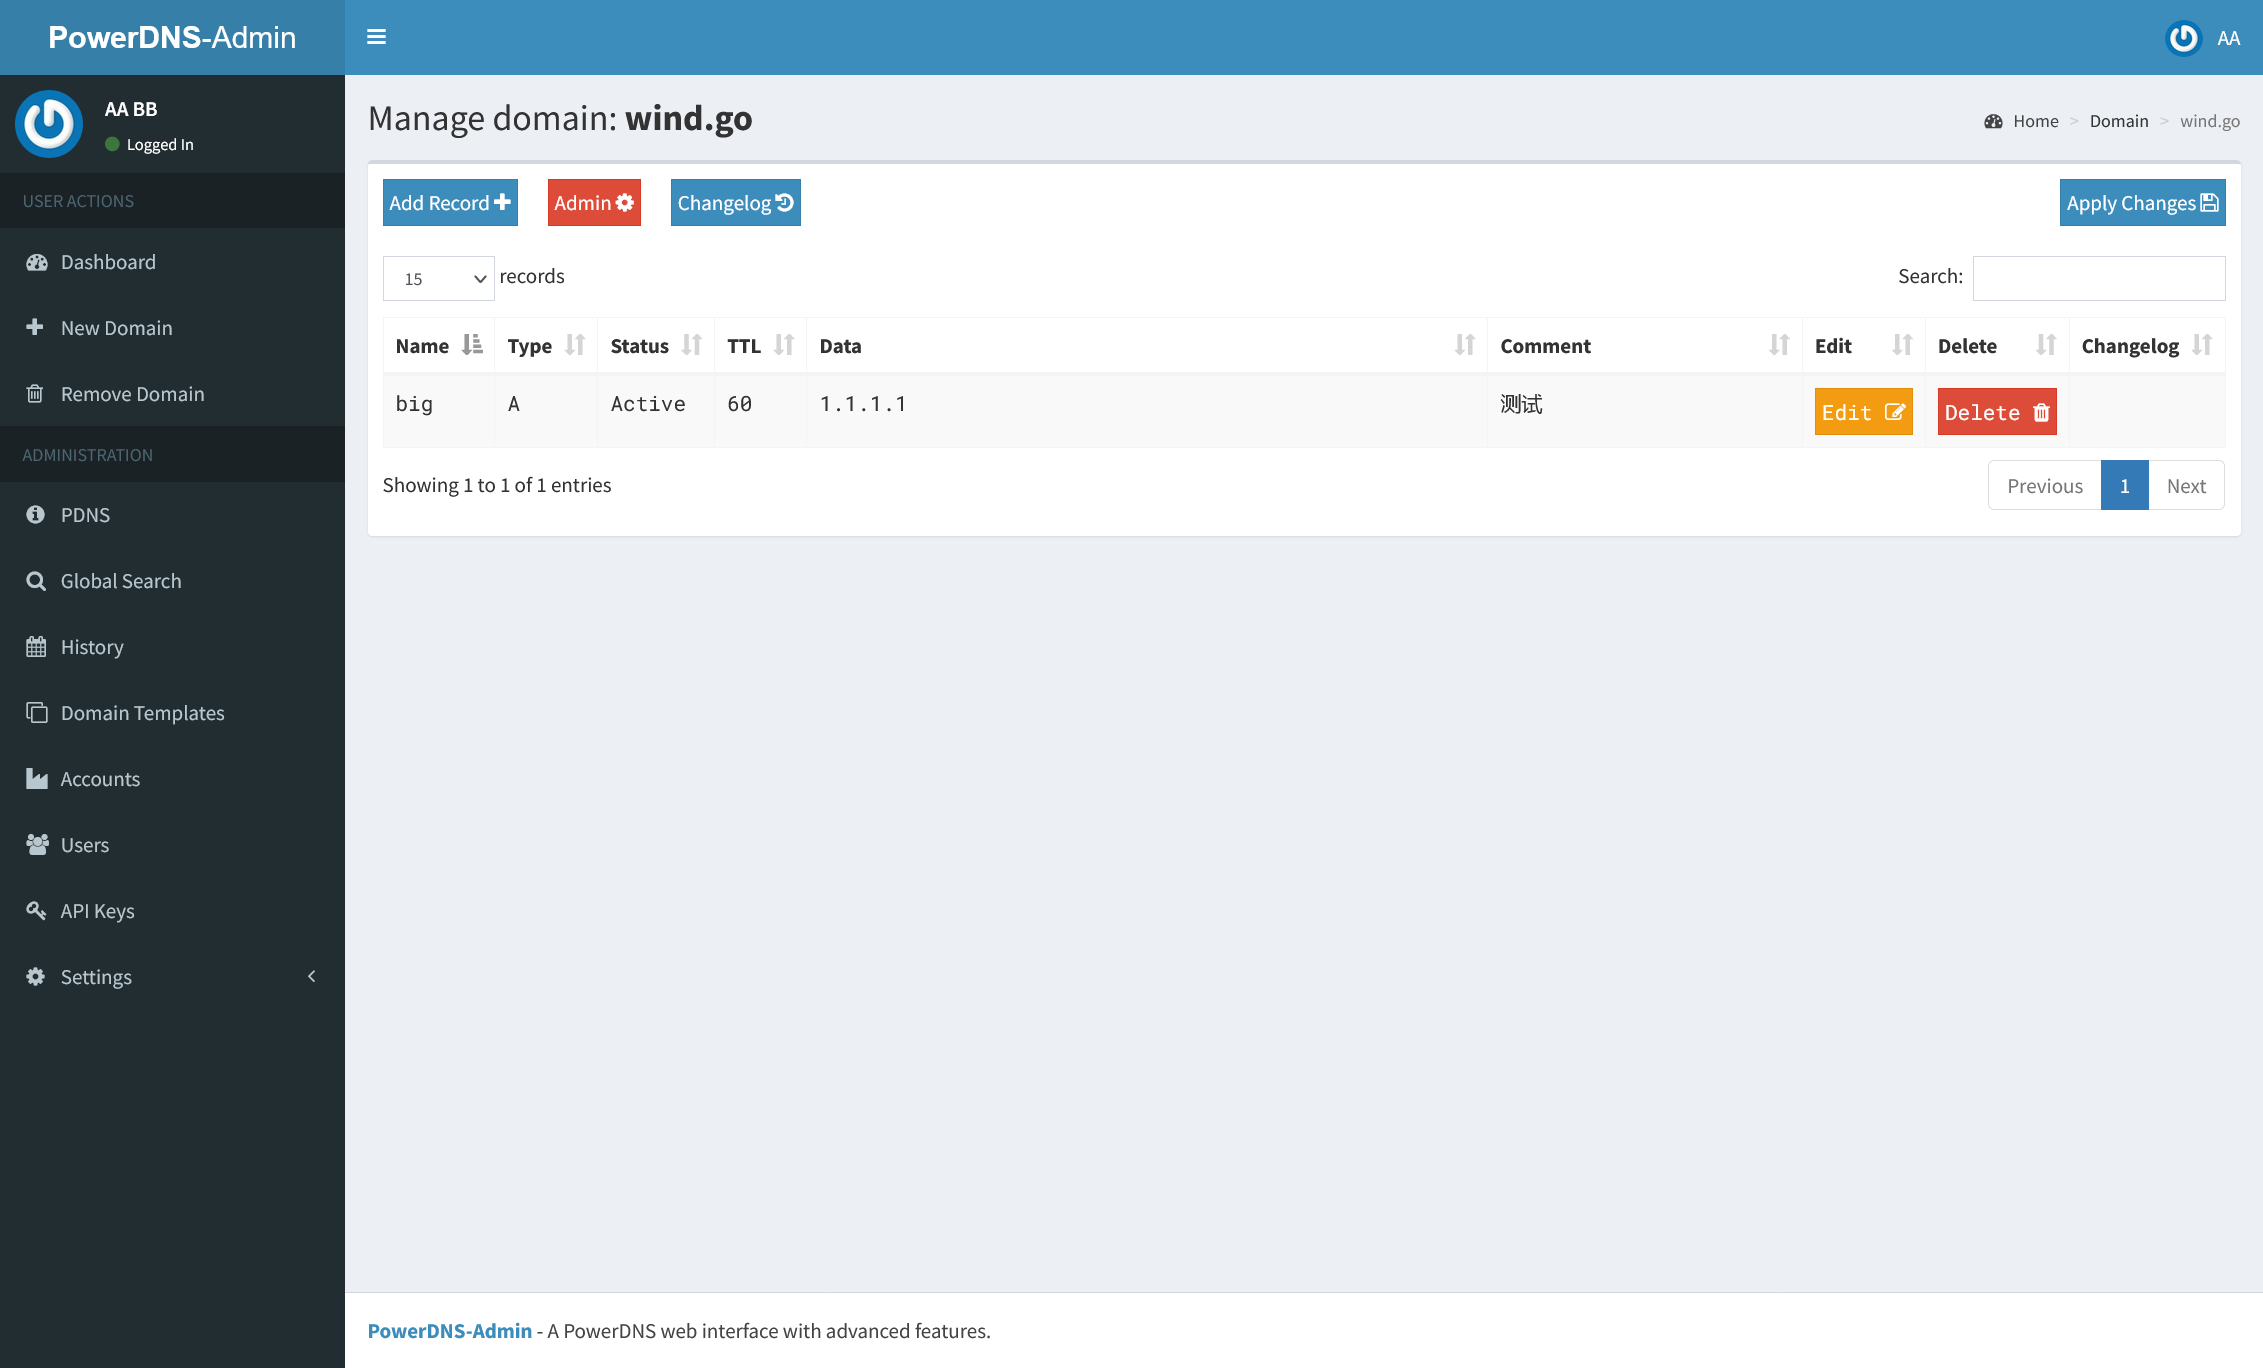
回到dashboard点击此域对应的Manage即可进行管理
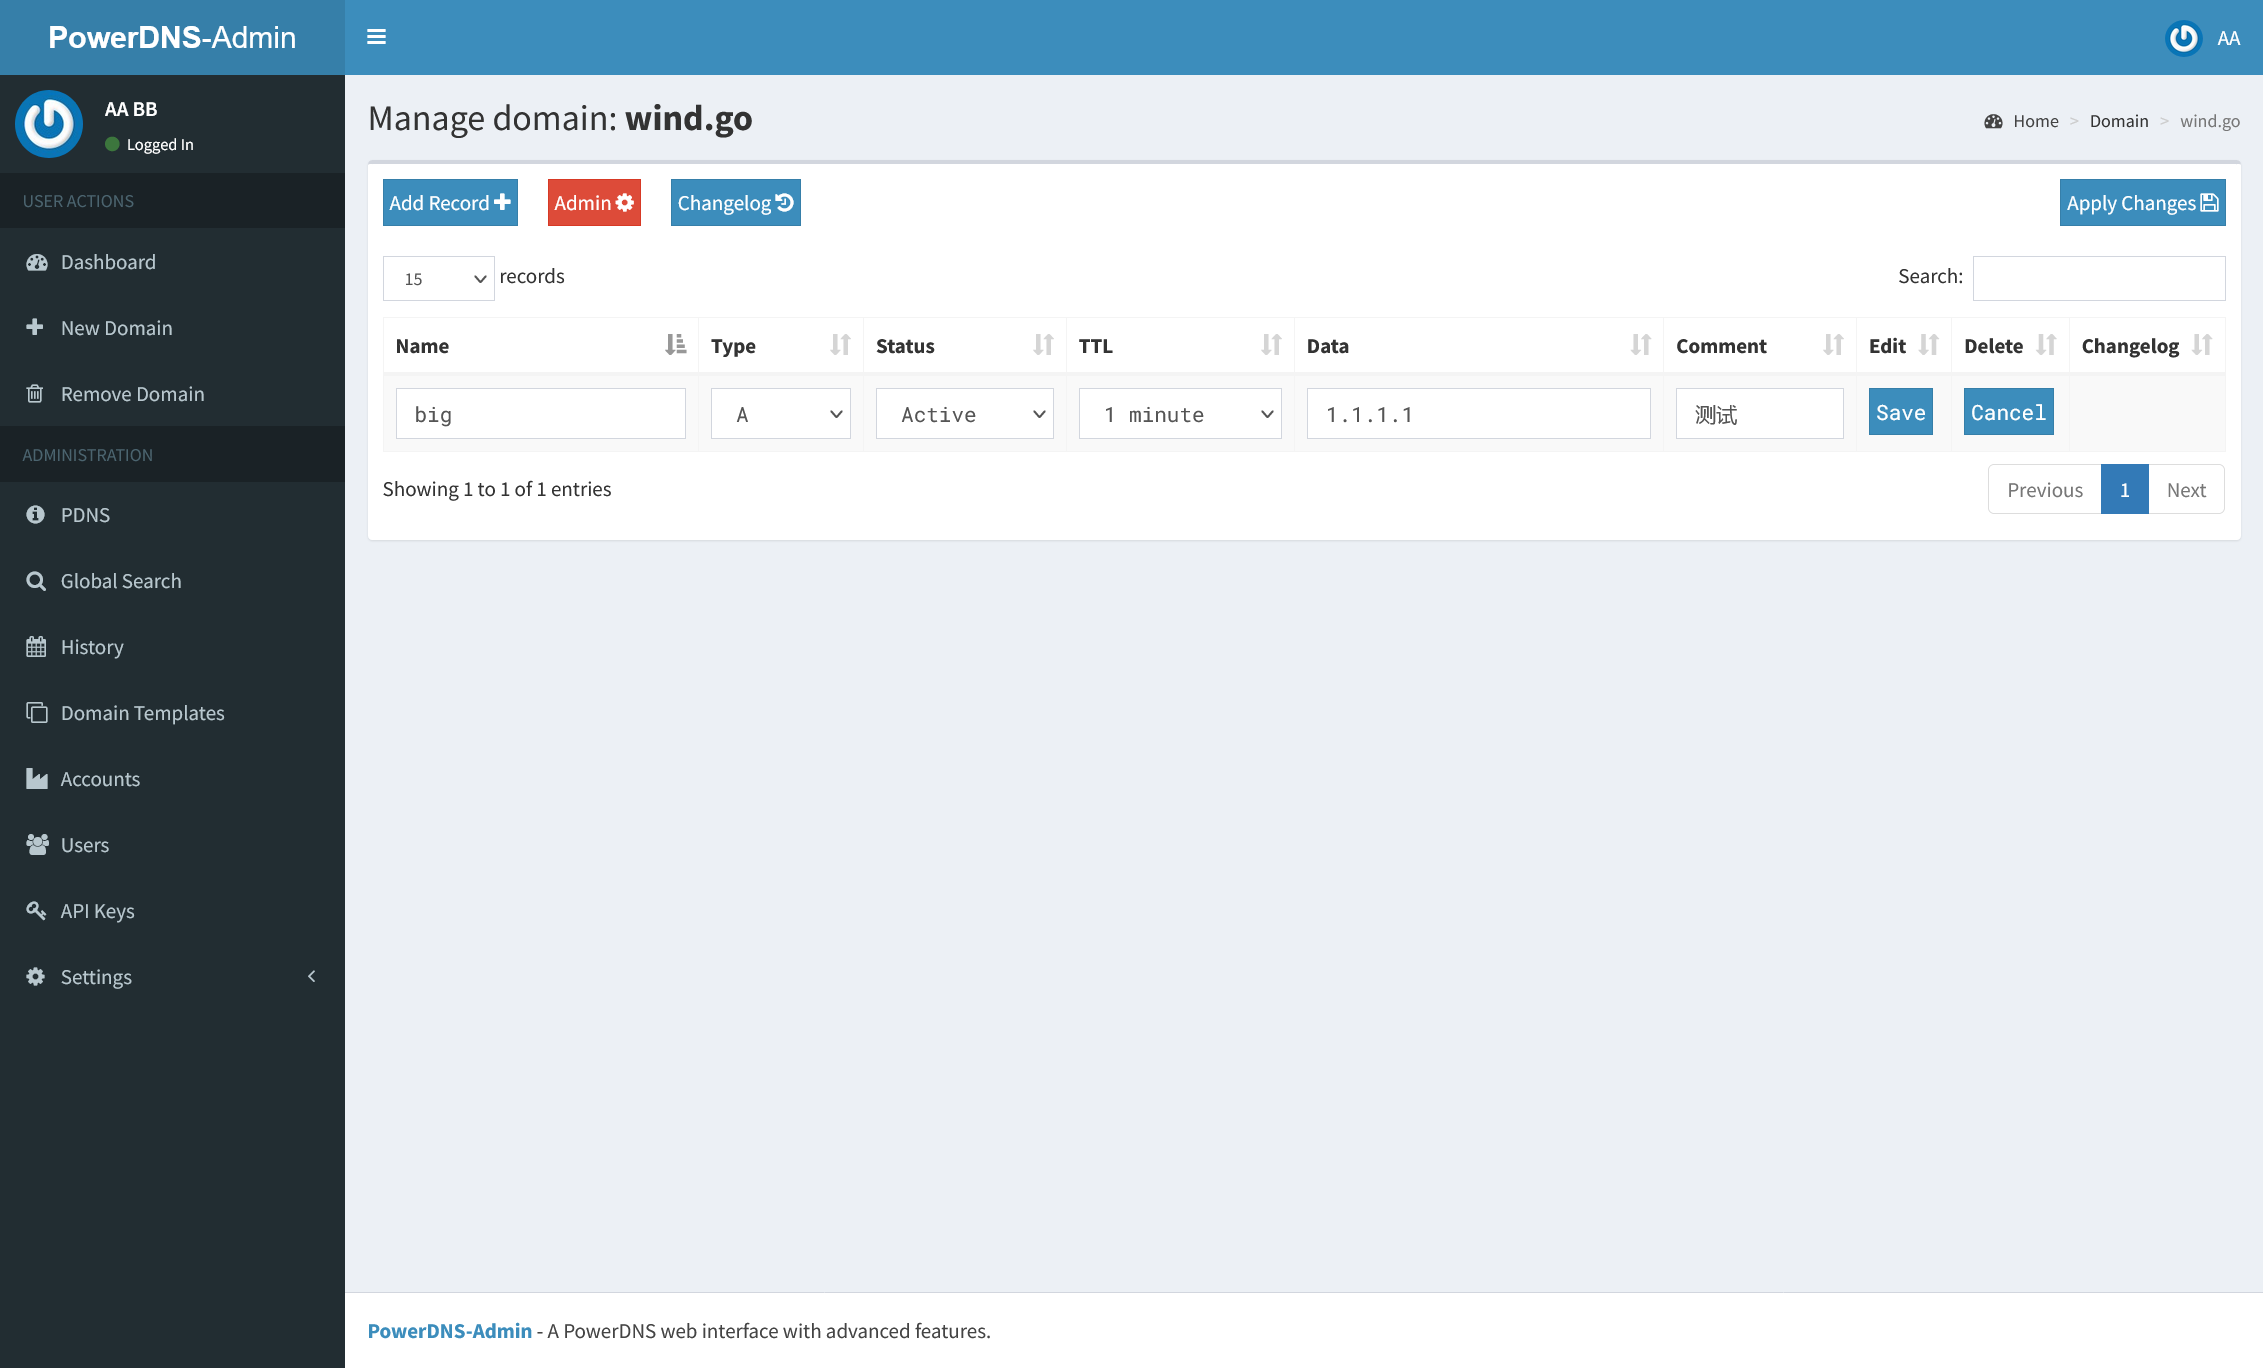
新增记录
点击Add Record即可新增解析记录,点击右上方的Apply Changes进行配置保存。
服务器可使用pdnsutil list-zone wind.go和dig +short big.wind.go @127.0.0.1进行验证:
[root@localhost ~]# pdnsutil list-zone wind.go
$ORIGIN .
big.wind.go     60      IN      A       1.1.1.1
wind.go 3600    IN      SOA     a.misconfigured.dns.server.invalid hostmaster.wind.go 2022021002 10800 3600 604800 3600

[root@localhost ~]# dig +short big.wind.go @127.0.0.1
1.1.1.1
删改记录
点击解析记录右侧的红色Delete按钮即可删除该记录,同理Edit按钮可修改记录,操作完成后,点击右上方的Apply Changes进行配置应用。
pdnsutil list-zone wind.go
$ORIGIN .
wind.go 3600    IN      SOA     a.misconfigured.dns.server.invalid hostmaster.wind.go 2022021003 10800 3600 604800 3600

dig +short big.wind.go @127.0.0.1
[无IP地址返回]
注意事项
PowerDNS-Admin无法显示并操作用户使用命令行创建的域,但反过来,使用PowerDNS-Admin创建的域在命令行中也是可见并可操作的,在此需要注意。
使用命令行工具管理Pdns
常用命令参考
create-zone ZONE [nsname] 创建一个空的域
add-record ZONE NAME TYPE [ttl] content  添加解析记录
delete-rrset ZONE NAME TYPE        删除解析记录
replace-rrset ZONE NAME TYPE [ttl] 替换(修改)解析记录
命令执行完成后,使用命令
pdns_control reload
进行重新加载。
关于更多命令的使用方法,请参见:
https://doc.powerdns.com/authoritative/manpages/pdnsutil.1.html
https://doc.powerdns.com/authoritative/manpages/pdns_control.1.html
进阶篇
主从域名构建
主从域建立需要安装两台同样的服务器,安装完成后,按照以上方法完成基础配置,并对服务器的配置文件进行进一步修改,主域服务器加入以下配置到/etc/pdns/pdns.conf
# 只有这些 IP 地址或网络掩码将能够执行 不带 TSIG 的 AXFR,0.0.0.0/0表示全部。
allow-axfr-ips=0.0.0.0/0

# 允许来自这些 IP 范围的 DNS 更新。0.0.0.0/0表示全部。
allow-dnsupdate-from=0.0.0.0/0
从域服务器加入以下配置到/etc/pdns/pdns.conf
allow-axfr-ips=0.0.0.0/0
allow-dnsupdate-from=0.0.0.0/0

# 打开作为辅助域的角色,4.5版本之前用slave=yes,4.5版本后弃用
secondary=yes
设置完成后,主从服务器都请通过systemctl restart pdns
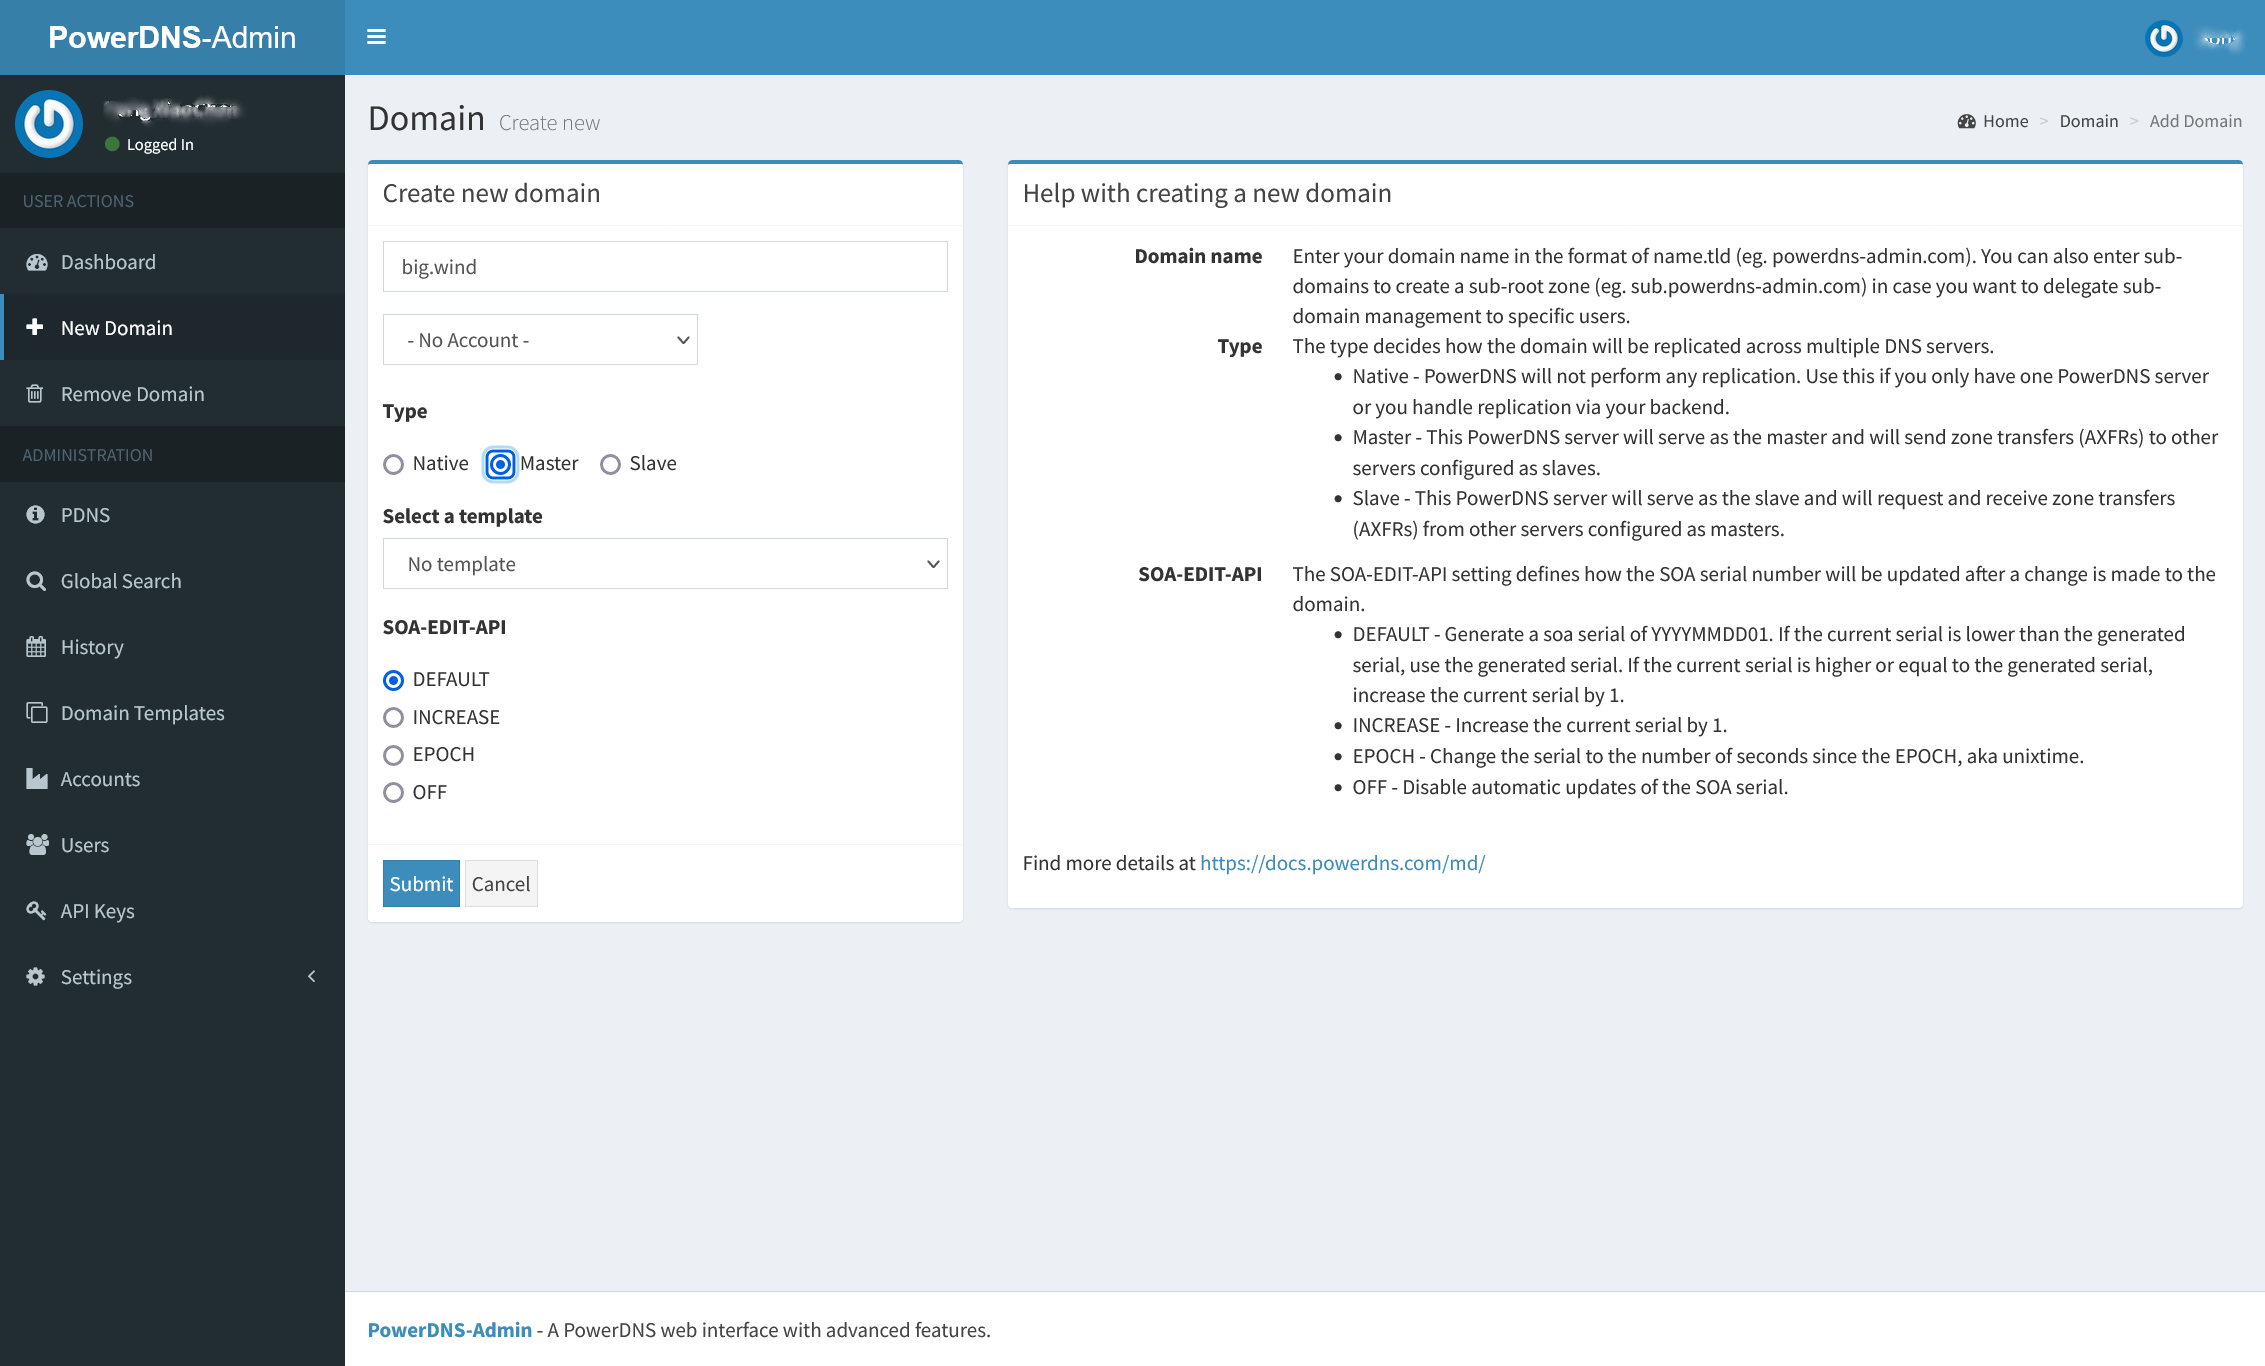
主从域名服务器IP分别为10.210.11.5和10.210.11.6,在主域服务器上创建一个Master域名,这里以big.wind为例:
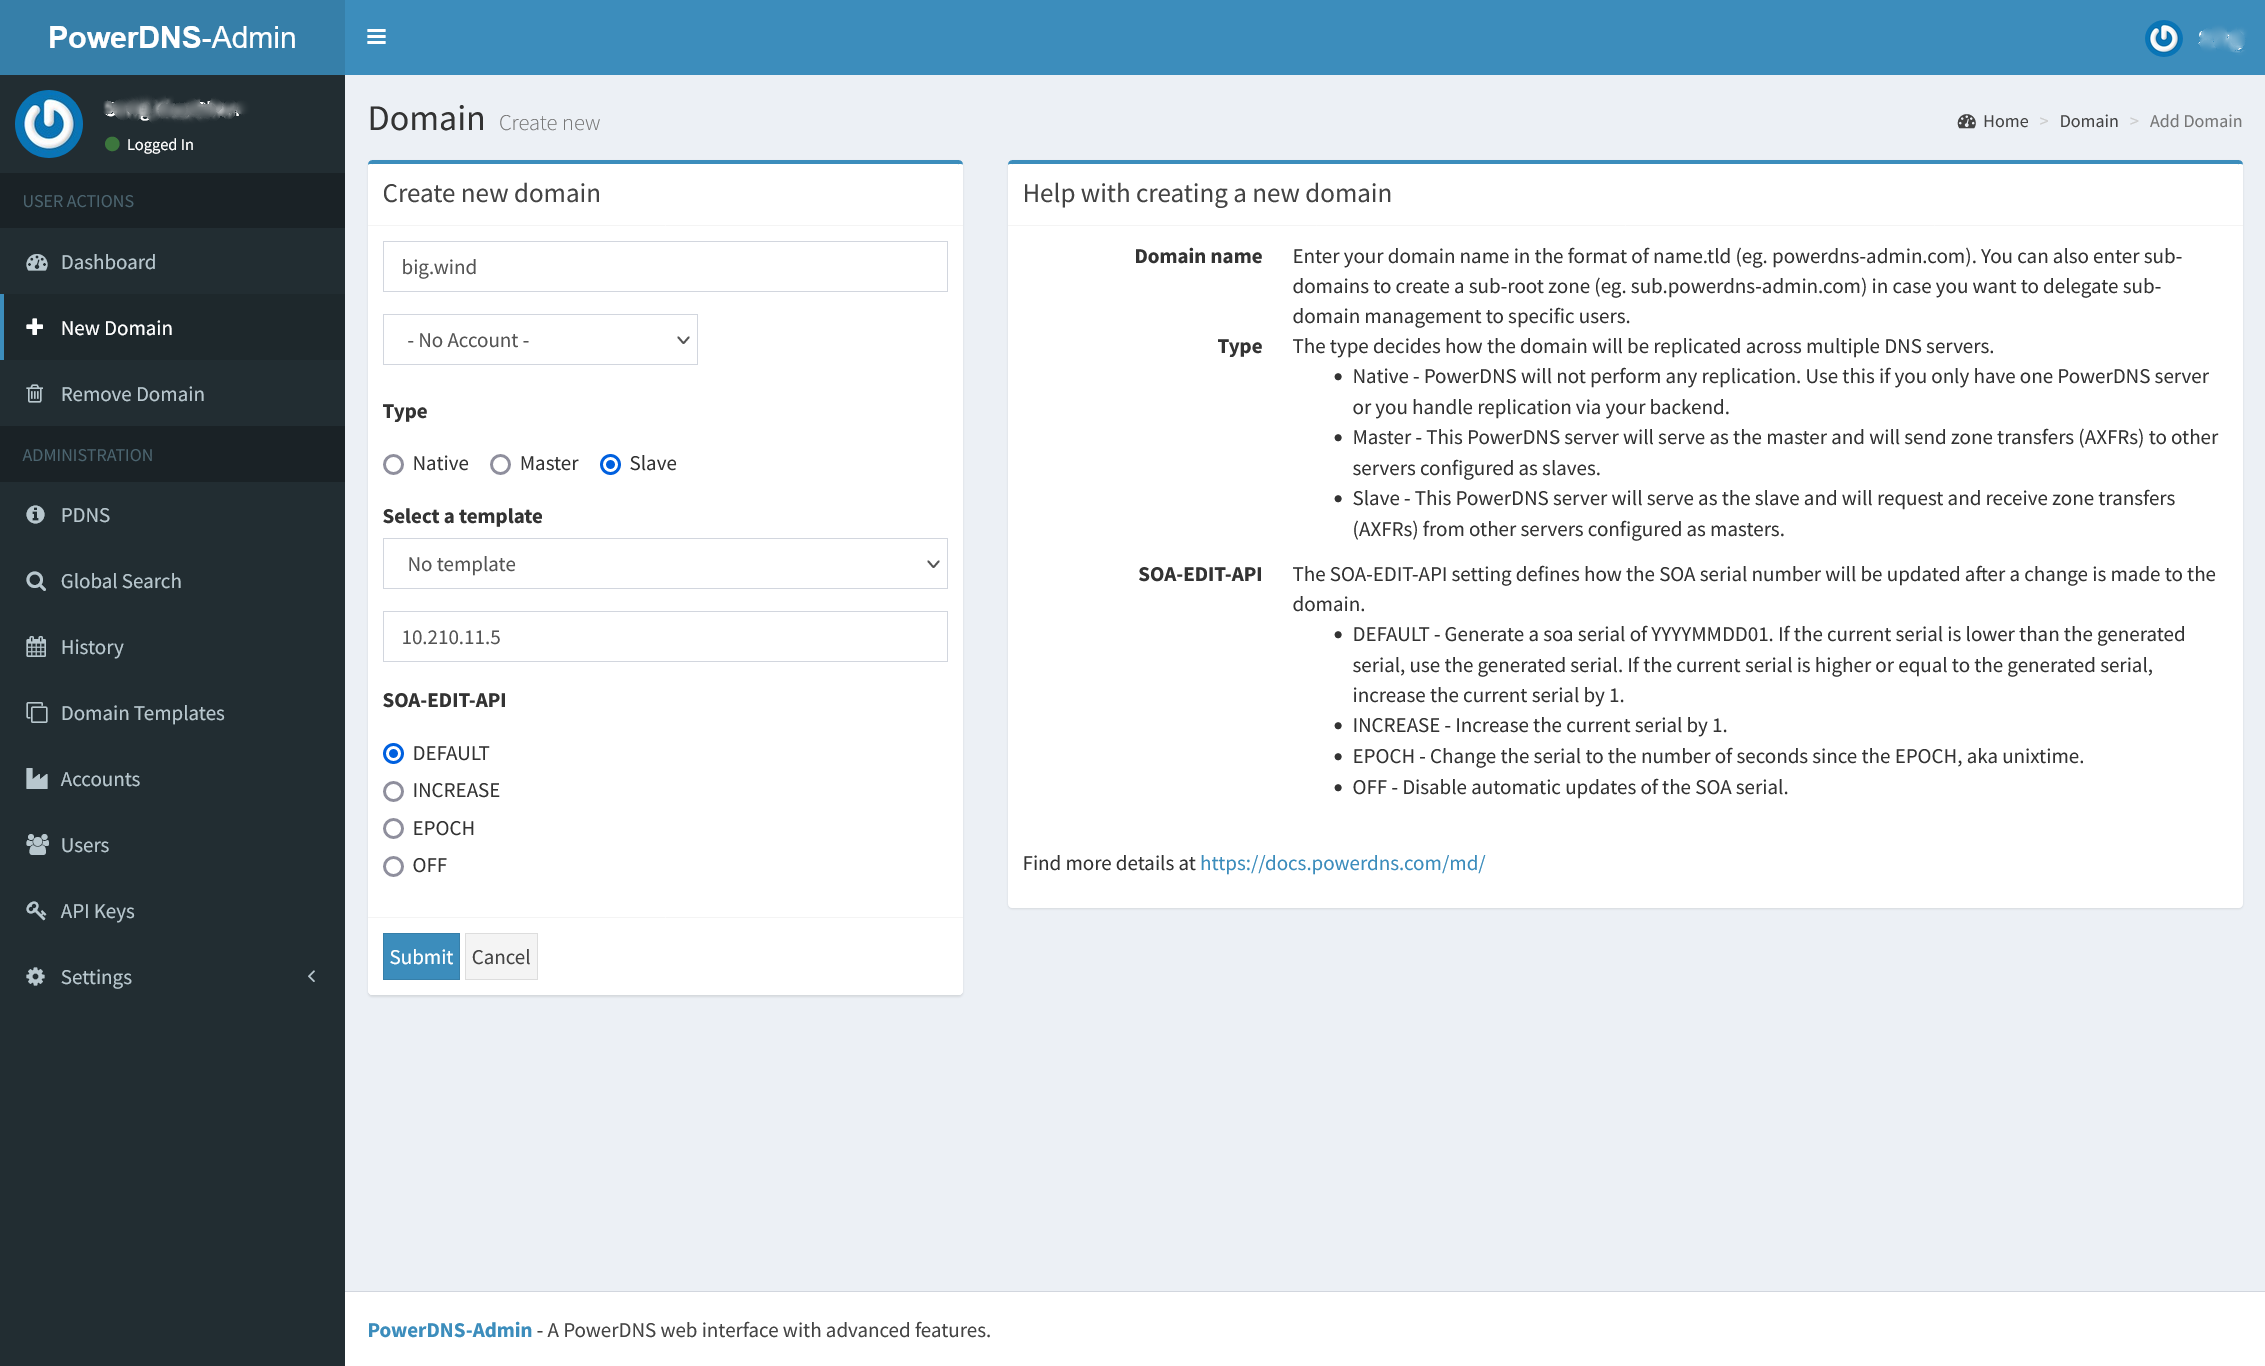
在从域服务器上创建一个Slave域名big.wind,并输入Master服务器的IP地址。
尝试在主域服务器上创建一条记录:

并到从域服务器上查看,但结果,我们发现主域服务器并未将配置同步给从域服务器。
这里,需要在主域服务器上进行配置,当域名big.wind发生更新时,通知给从域名服务器:
$pdnsutil set-meta big.wind ALSO-NOTIFY 10.210.11.6:53
Set 'big.wind' meta ALSO-NOTIFY = 10.210.11.6:53
完成此配置后,再到主域服务器上进行配置更新时,就会同步给从域服务器,两台服务器即具备同样的解析能力,并自动同步,客户端在配置服务器时,可同时配置两台DNS,这样实现了DNS服务的高可用,当主域服务器宕机,从域服务器依旧可提供此域名的解析能力。
域名动态解析
递归服务器(Recursor)
应用场景
递归服务器与权威服务器的区别在于,递归服务器本身并不提供解析,而是将客户端需要解析的内容交由其它服务器来进行解析,而权威服务器则是直接查询数据库去尝试解析,数据库中若不存在此记录,则直接返回空结果。
为了更简单理解,不妨举个例子:
用户要通过权威服务器来解析big.wind域名,权威服务器的做法是,查询本地数据库,有则返回结果,木有则返回空,当然对于用户来说,返回空则代表解析失败;
用户通过递归服务器来解析big.wind域名,递归服务器此时可以设置成两种方式,
方式一:把解析请求转给权威服务器,权威服务器上若存在该记录,则返回该记录的解析结果,若不存在该记录,则返回空,用户解析失败;
方式二:把继续请求转给权威服务器,权威服务器上若存在该记录,则返回该记录的解析结果,若不存在该记录,则继续通过递归方式向其它DNS查询该记录,最终,若查询到,则返回结果,若查询不到,则返回空,用户解析失败。
服务安装
pdns-recursor安装,以CentOS7为例,执行以下命令,静待安装结束,则完成了4.6版本的安装:
yum install epel-release yum-plugin-priorities -y &&
curl -o /etc/yum.repos.d/powerdns-rec-46.repo https://repo.powerdns.com/repo-files/el-rec-46.repo &&
yum install pdns-recursor -y
修改配置文件/etc/pdns-recursor/recursor.conf,修改后文件如下:
# 系统默认配置,勿动
setgid=pdns-recursor
setuid=pdns-recursor

# 接受哪些IP的查询请求,0.0.0.0/0表示全部
allow-from=0.0.0.0/0

# 本地监听的接口IP地址
local-address=0.0.0.0

# 关闭dnssec功能,4.5版本后默认开启
dnssec=off
使用命令启用并查看pdns-recursor运行状态:
[root@localhost ~]# systemctl enable pdns-recursor --now
Created symlink from /etc/systemd/system/multi-user.target.wants/pdns-recursor.service to /usr/lib/systemd/system/pdns-recursor.service.
[root@localhost ~]#
[root@localhost ~]# systemctl status pdns-recursor
● pdns-recursor.service - PowerDNS Recursor
   Loaded: loaded (/usr/lib/systemd/system/pdns-recursor.service; enabled; vendor preset: disabled)
   Active: active (running) since 二 2022-02-15 10:47:42 CST; 14s ago
     Docs: man:pdns_recursor(1)
           man:rec_control(1)
           https://doc.powerdns.com
 Main PID: 14327 (pdns_recursor)
    Tasks: 5
   Memory: 11.7M
   CGroup: /system.slice/pdns-recursor.service
           └─14327 /usr/sbin/pdns_recursor --socket-dir=/run/pdns-recursor --daemon=no --write-pid=no --disable-syslog --log-timestamp=no

2月 15 10:47:42 localhost.localdomain pdns-recursor[14327]: Listening for UDP queries on 127.0.0.1:53
2月 15 10:47:42 localhost.localdomain pdns-recursor[14327]: Enabled TCP data-ready filter for (slight) DoS protection
2月 15 10:47:42 localhost.localdomain pdns-recursor[14327]: Listening for TCP queries on 127.0.0.1:53
2月 15 10:47:42 localhost.localdomain pdns-recursor[14327]: Launching 1 distributor threads
2月 15 10:47:42 localhost.localdomain systemd[1]: Started PowerDNS Recursor.
2月 15 10:47:42 localhost.localdomain pdns-recursor[14327]: Launching 2 worker threads
2月 15 10:47:42 localhost.localdomain pdns-recursor[14327]: Done priming cache with root hints
2月 15 10:47:42 localhost.localdomain pdns-recursor[14327]: Enabled 'epoll' multiplexer
2月 15 10:47:43 localhost.localdomain pdns-recursor[14327]: Refreshed . records
2月 15 10:47:50 localhost.localdomain pdns-recursor[14327]: Polled security status of version 4.6.0, no known issues reported: OK
至此,pdns-recursor安装完成。
递归服务器开启本地解析
#修改配置文件/etc/pdns-recursor/recursor.conf

export-etc-hosts=on
etc-hosts-file=/etc/pdns-recursor/dns-hosts.local

#创建本地解析文件/etc/pdns-recursor/dns-hosts.local 并添加本地解析如下

10.114.67.2 yst.vip

#重启 pdns-recursor
日常操作
配置修改
递归服务器(pdns-recursor)日常操作相对权威服务器而言要少很多,递归服务器并没有图形化配置界面,也没必要,主要操作即修改递归服务器的配置文件/etc/pdns-recursor/recursor.conf来实现。
向配置文件中添加以下内容:
# 转发请求,不允许递归。
forward-zones=big.wind=10.210.11.5,a.b.c=10.5.2.4:553

# 转发请求,并允许递归。
forward-zones-recurse=baidu.com=223.5.5.5,.=114.114.114.114
达成效果;
用户请求递归服务器解析*.big.wind,递归服务器会向10.210.11.5来询问结果,若10.210.11.5存在这条记录,则将解析结果返回给递归服务器,递归服务器再返回给用户,用户得到解析结果,若10.210.11.5不存在这条记录,则返回空值给递归服务器,递归服务器将此空值返回给用户,用户则解析该域名失败,同理,a.b.c将向10.5.2.4的553端口来进行询问,并以同样的方式来工作。
用户请求递归服务器解析map.baidu.com,递归服务器会向223.5.5.5来询问结果,当然,因为223.5.5.5并非是baidu.com的权威服务器,所以不会存在map.baidu.com的记录,但纵然是没有,223.5.5.5也能通过其它方式获取到baidu.com的解析结果,并将结果返回给递归服务器,递归服务器拿到这个结果后,返回给用户。同样,其它域名会向114.114.114.114来询问。
WEB&API
前文提到递归服务器并没有图形化的配置界面,但仍然提供了web服务及api服务,可以通过向配置文件中添加以下内容来完成web服务的开启:
webserver=yes
webserver-allow-from=0.0.0.0/0
webserver-address=0.0.0.0
webserver-port=8082

# 开启webserver,允许所有ip访问,web服务监听IP为所有接口IP,web服务器监听端口号8082
web开启后,则可通过http://<服务器IP>:8082访问web服务,可看到当下服务器的工作状态:
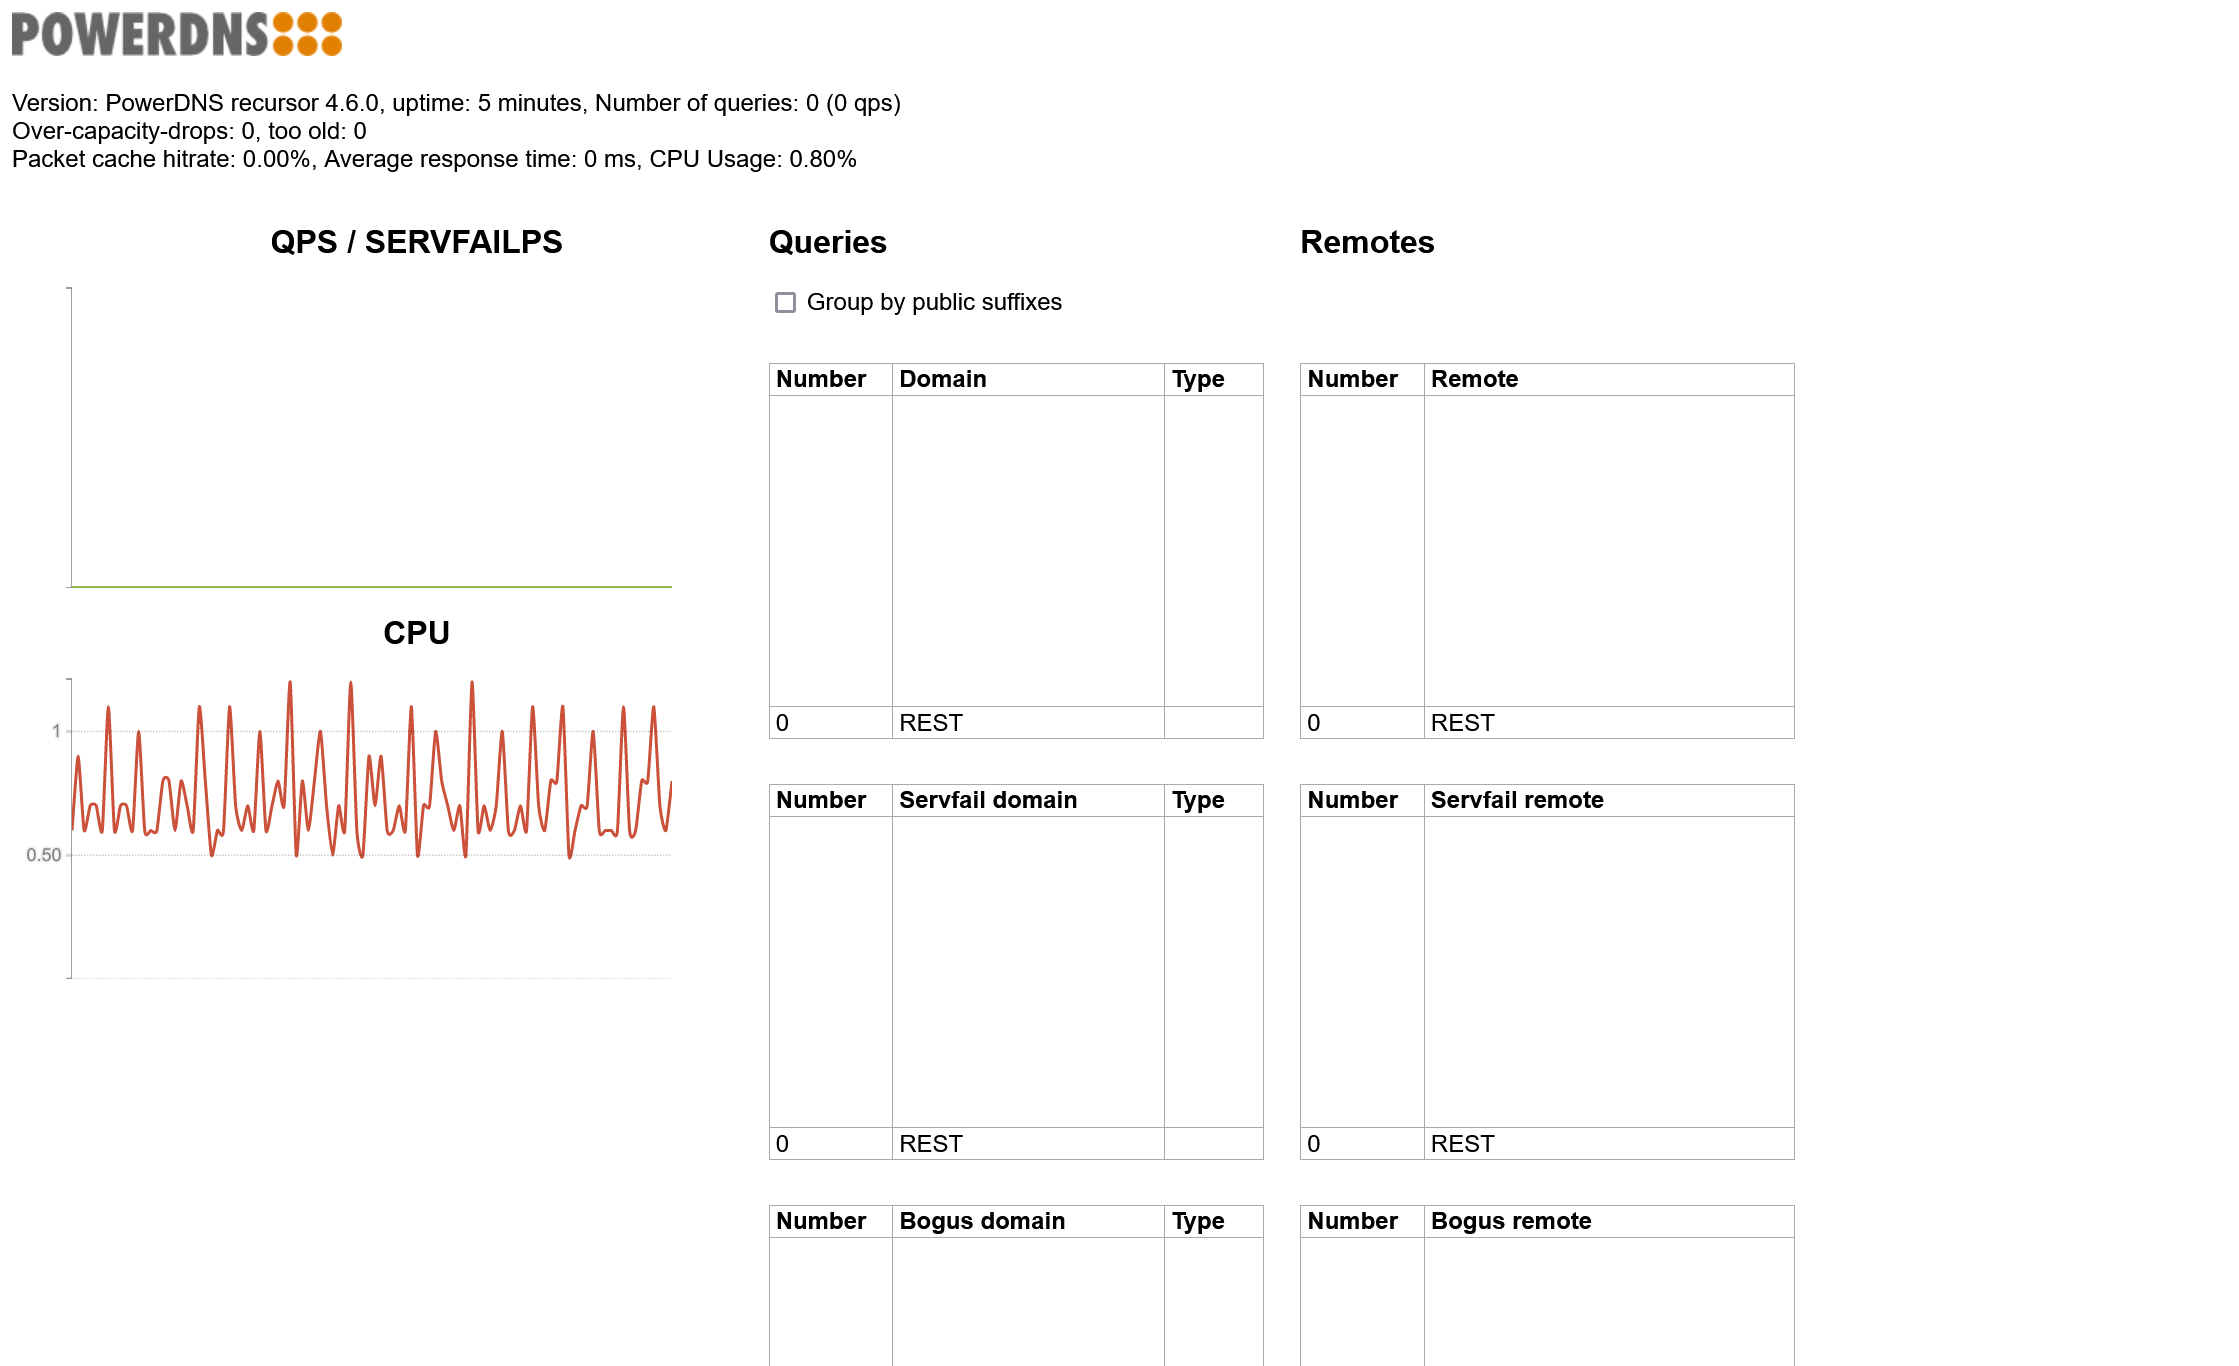
若存在多台递归服务器,显然使用脚本调用API来进行配置,是最明智的。
创建/var/zones文件夹,用于放置配置文件,并将所有者授权给pdns-recursor:
mkdir /var/zones
chown pdns-recursor:pdns-recursor /var/zones
修改递归服务器配置文件,加入以下内容
api-key=abcd.1234
api-config-dir=/var/zones/
include-dir=/var/zones

# 加入api-key,api配置文件位置/var/zones,将/var/zones文件夹包含进配置文件
修改完成后,需要对服务进行重启。
使用以下命令进行验证(若有(23) Failed writing body报错,请先yum -y install jq )
[root@localhost ~]# curl -v -H 'X-API-Key: abcd.1234' http://127.0.0.1:8082/api/v1/servers/localhost | jq .
返回以下结果,则表示API启用成功:
<---此处省略若干字符--->
{
  "config_url": "/api/v1/servers/localhost/config{/config_setting}",
  "daemon_type": "recursor",
  "id": "localhost",
  "type": "Server",
  "url": "/api/v1/servers/localhost",
  "version": "4.6.0",
  "zones_url": "/api/v1/servers/localhost/zones{/zone}"
}
此时我们添加sina.cn的解析,到10.5.22.11:53,并且允许其递归:
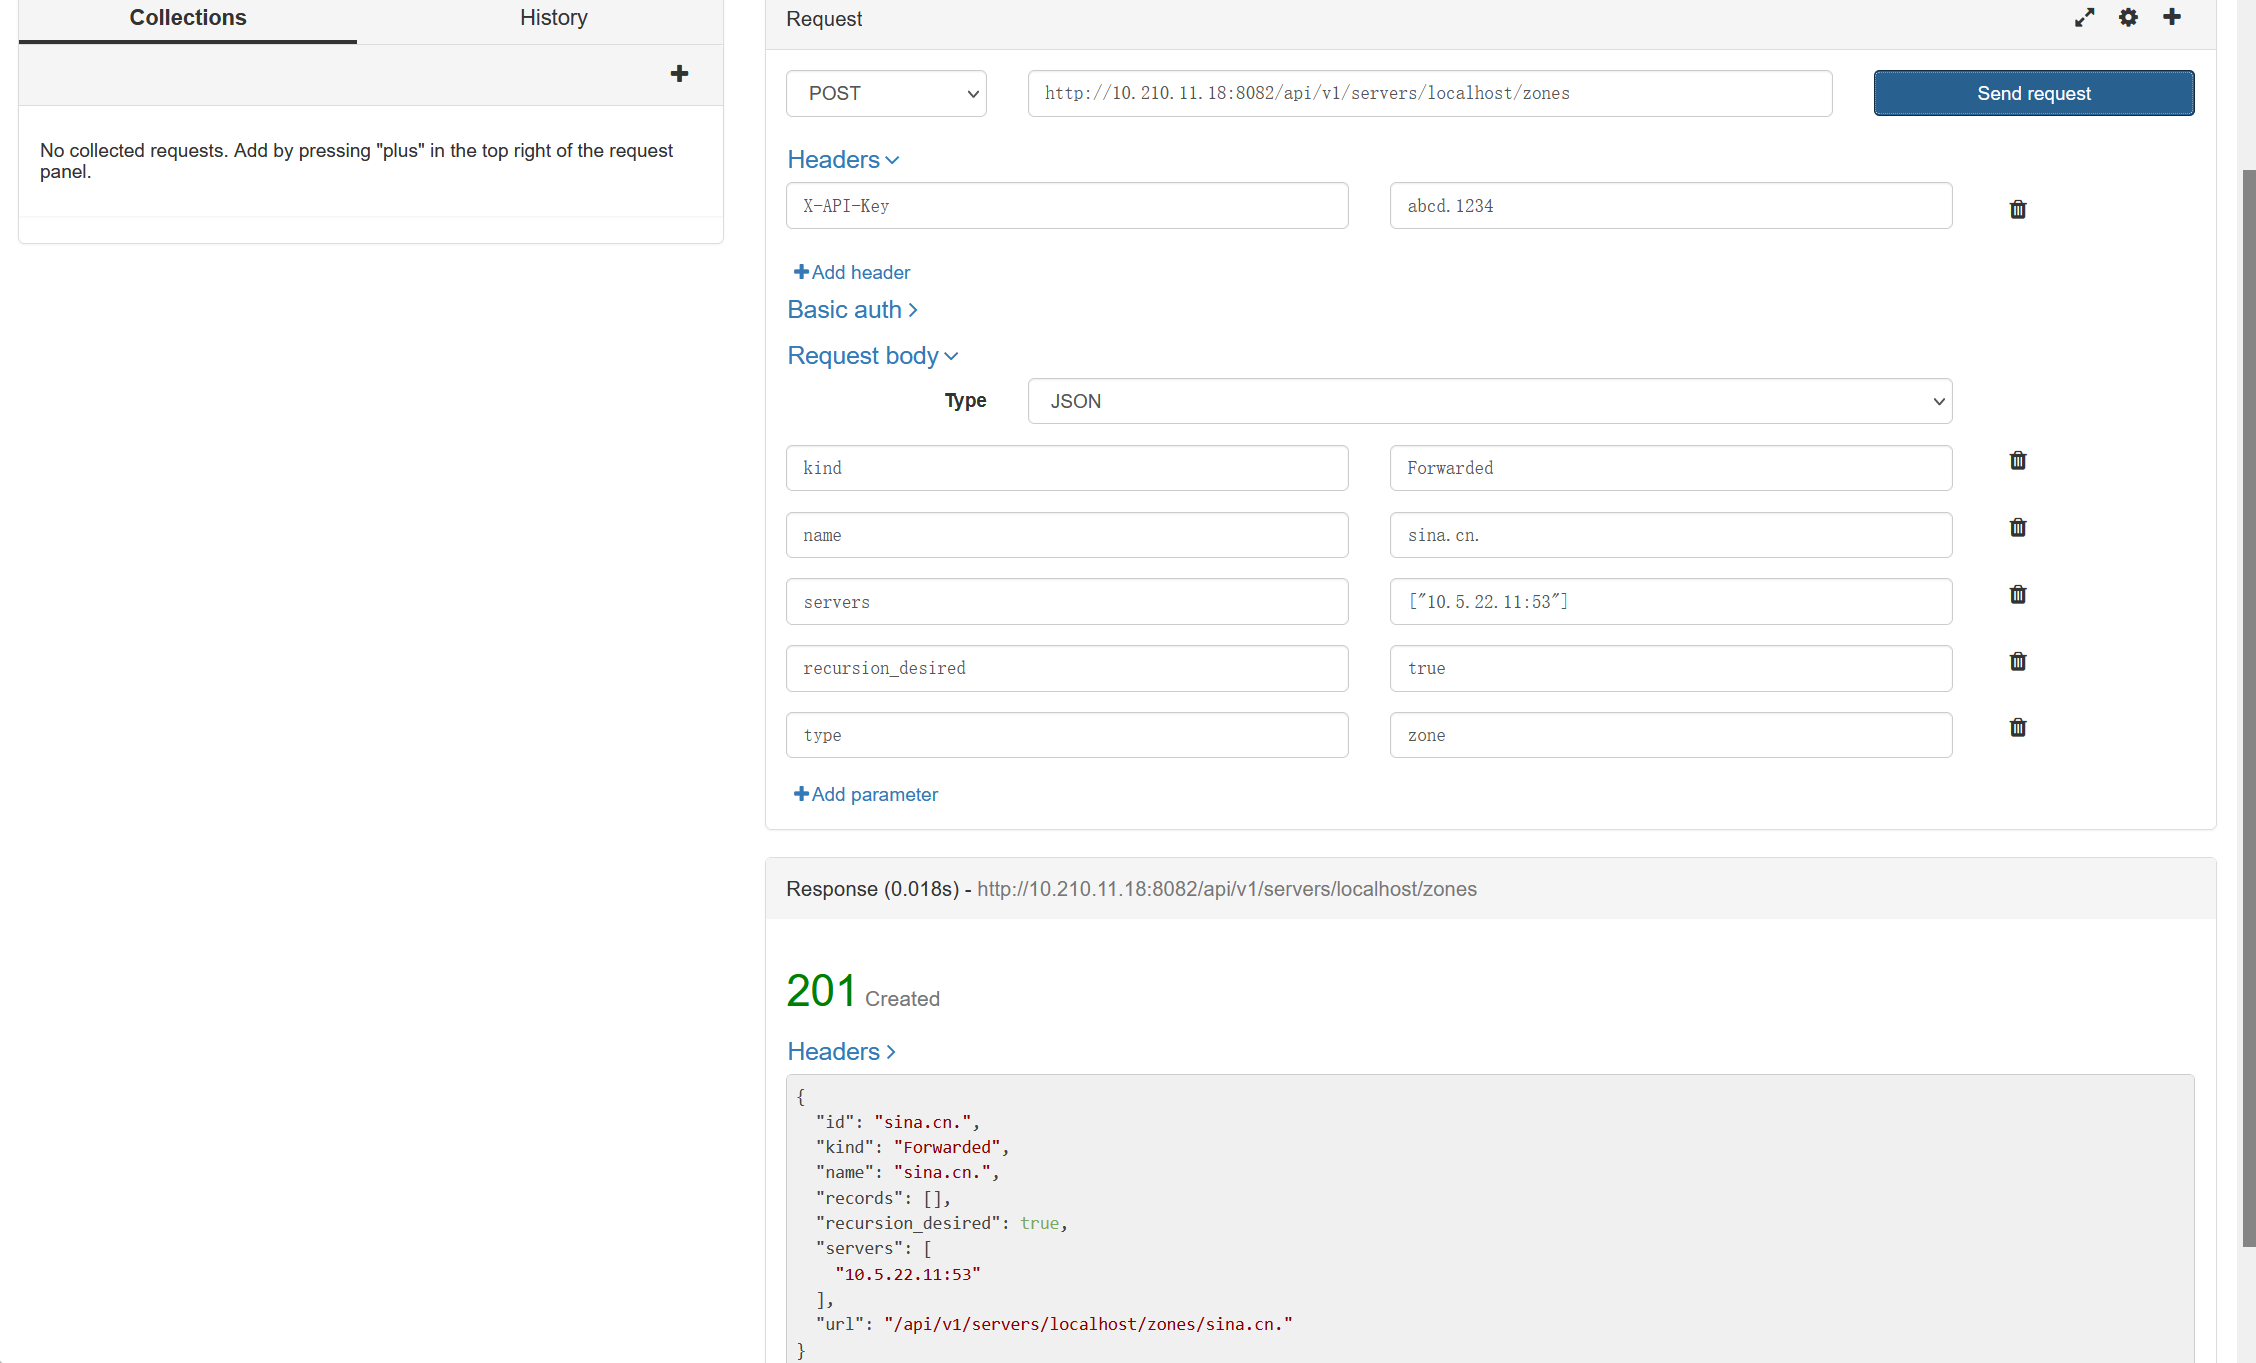
添加完成后,到递归服务器的/var/zones文件夹下会发现一个 zone-sina.cn..conf的文件,查看内容,显示如下:
[root@localhost ~]# cat /var/zones/zone-sina.cn..conf
# Generated by pdns-recursor REST API, DO NOT EDIT
forward-zones-recurse+=sina.cn.=10.5.22.11:53
再次尝试将qq.com的解析递归只10.1.1.1,并且不允许递归:
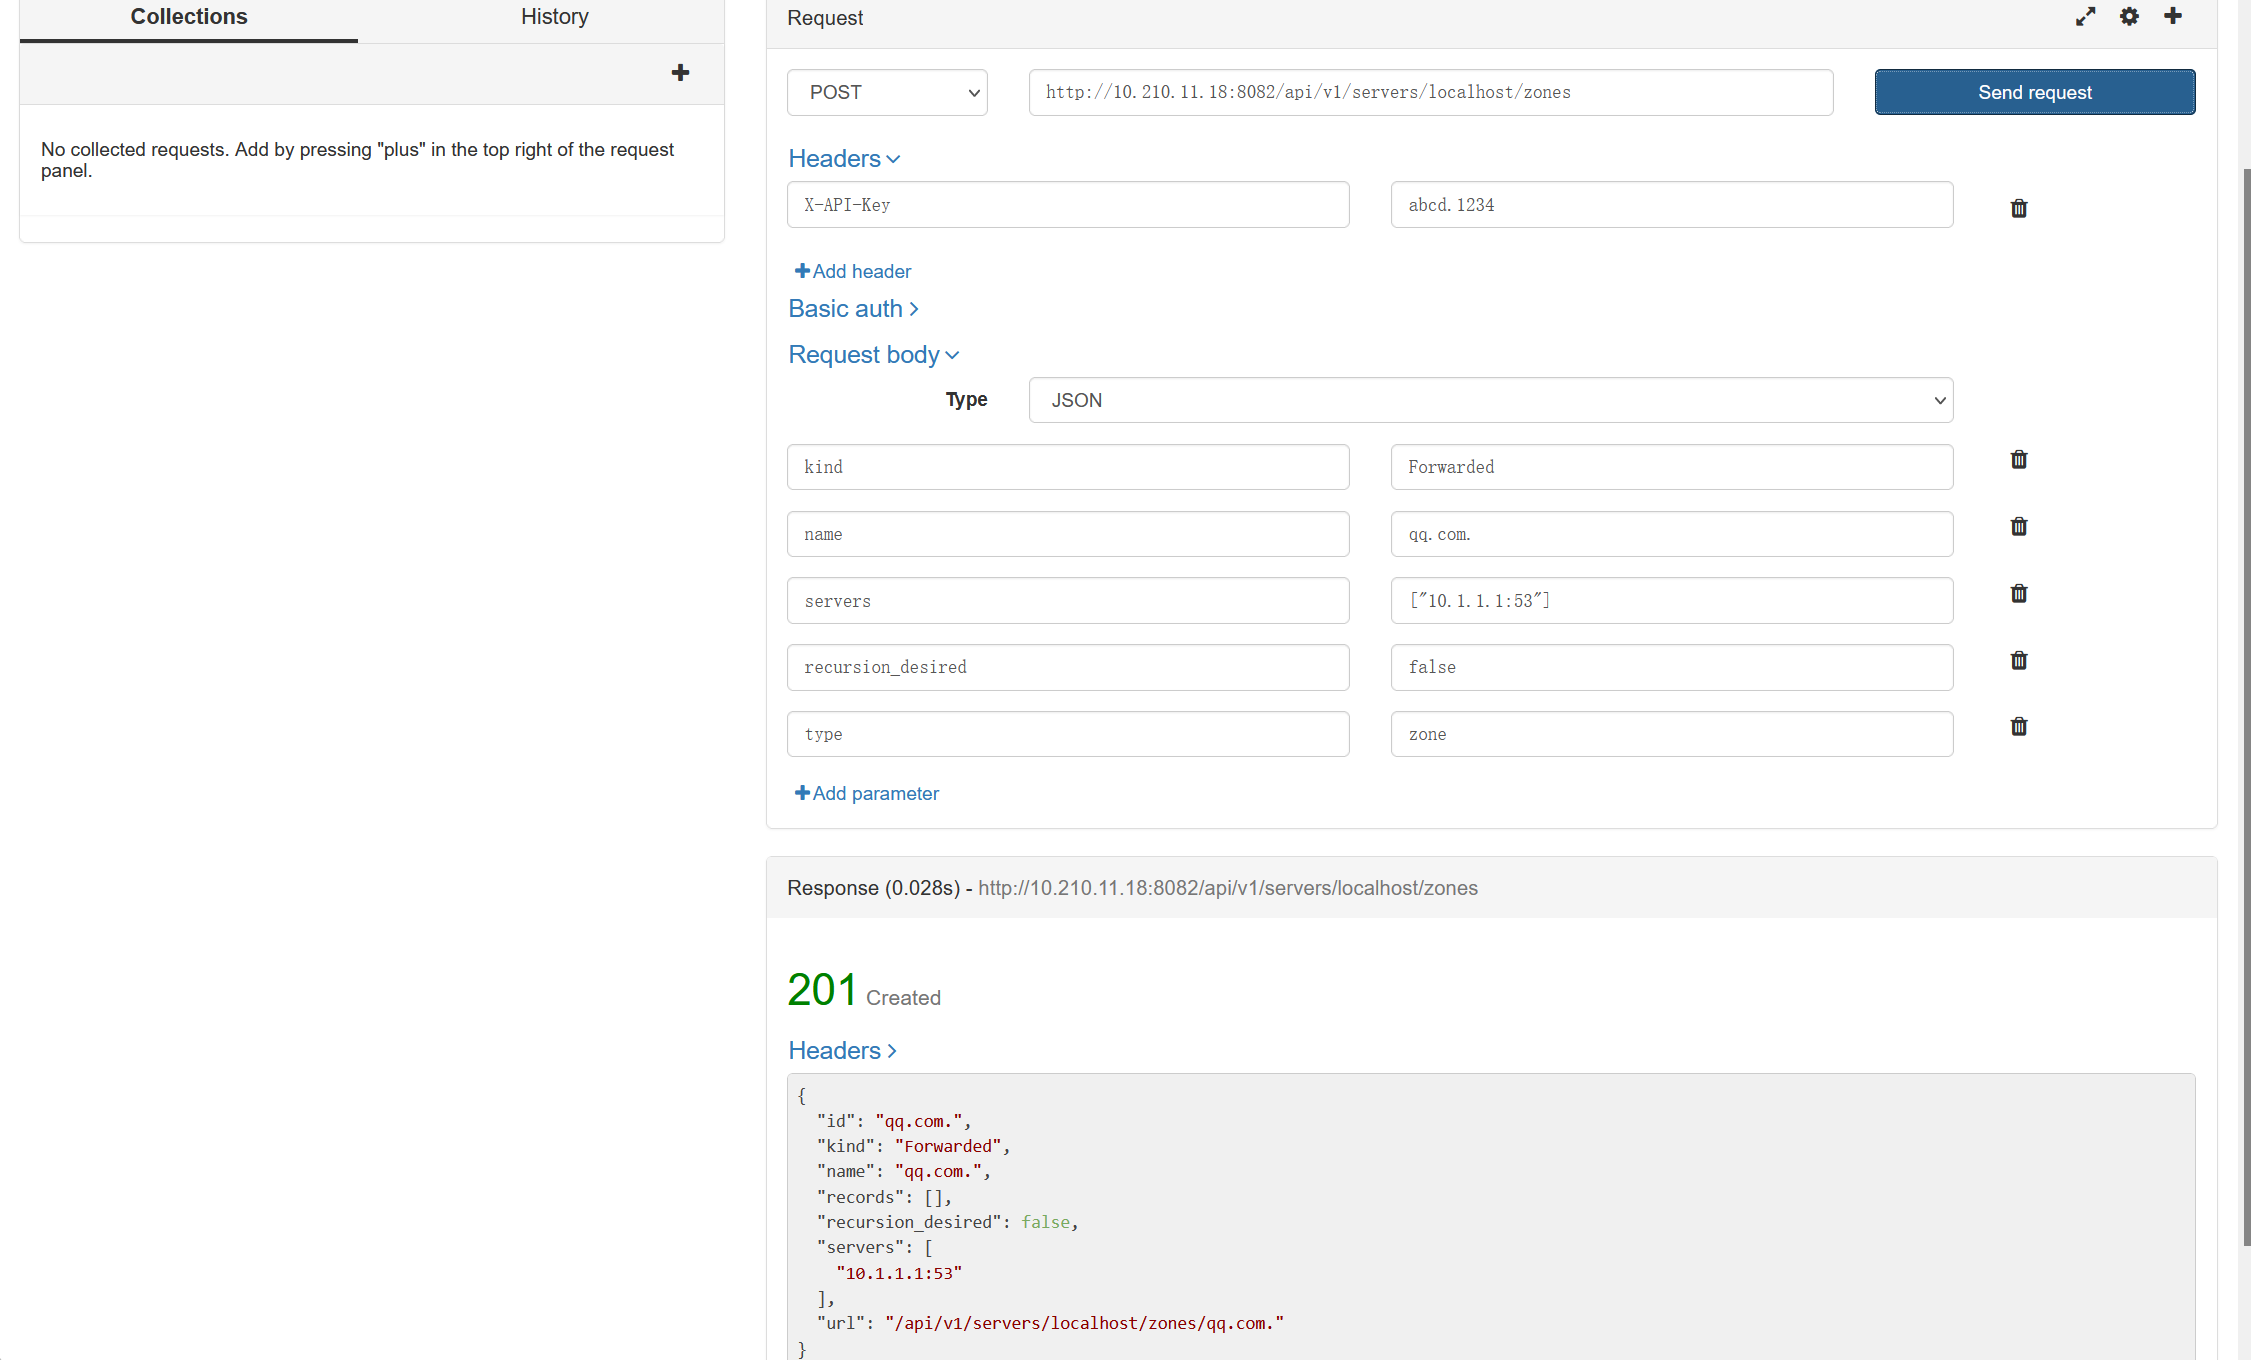
查看/var/zones目录下多了一个zone-qq.com..conf文件,文件内容如下:
[root@localhost ~]# cat /var/zones/zone-qq.com..conf
# Generated by pdns-recursor REST API, DO NOT EDIT
forward-zones+=qq.com.=10.1.1.1:53
将以上内容转换成Python代码,如下:
import requests , json

def set_forwarded_zone(recursor,domainname,dns,dnsport=53,boolean = False):
    url = 'http://%s:8082/api/v1/servers/localhost/zones'%recursor
    headers = {'X-API-Key':'abcd.1234'}
    data = {
        "kind":"Forwarded",
        "name":domainname+'.',
        "servers":["%s:%s"%(dns,dnsport)],
        "recursion_desired":boolean,
        "type":"zone"
    }
    data = json.dumps(data)
    req = requests.post(url=url,headers=headers,data=data)
    print(req.text)
添加sina.cn的解析,到10.5.22.11:53,并且允许其递归:
set_forwarded_zone('10.210.11.18','sina.cn','10.5.22.11',53,True)
执行后返回结果:
{"id": "sina.cn.", "kind": "Forwarded", "name": "sina.cn.", "records": [], "recursion_desired": true, "servers": ["10.5.22.11:53"], "url": "/api/v1/servers/localhost/zones/sina.cn."}
qq.com的解析递归到10.1.1.1,并且不允许递归,执行:
set_forwarded_zone('10.210.11.18','qq.com','10.1.1.1',53)
执行后返回结果:
{"id": "qq.com.", "kind": "Forwarded", "name": "qq.com.", "records": [], "recursion_desired": false, "servers": ["10.1.1.1:53"], "url": "/api/v1/servers/localhost/zones/qq.com."}
以上配置生效后,预期效果:10.5.22.11和10.1.1.1并非是sina.cn和qq.com的权威服务器,由于sina.cn允许递归,理论上可以得到解析结果,而qq.com由于不允许递归,则无法解析。
进行验证:
[root@localhost ~]# dig +short @10.210.11.18 sina.cn
[root@localhost ~]# dig +short @10.210.11.18 qq.com
[root@localhost ~]#
结果都无解析结果返回,推测,可能是由于10.5.22.11和10.1.1.1都不是dns服务器导致,在此,将转发目标都指向一台dns服务器10.210.2.7,再次尝试。
修改 zone-sina.cn..conf和zone-qq.com..conf文件,重启递归服务再次尝试:
[root@localhost ~]# dig +short @10.210.11.18 sina.com
66.102.251.24
[root@localhost ~]# dig +short @10.210.11.18 qq.com
[root@localhost ~]#
所以,递归转发到目标服务器,目标服务器必须是一台DNS,允许转发的选项才会生效。